How to Choose a Blog Topic
If you’ve ever thought about how to start a blog, now’s the time to make it happen.
This is your all-inclusive, step-by-step guide to launching your own blog.
Find a Viable Niche
A niche is a specific thing you talk about in your blog.
Your niche should be a specific angle on a broad topic. You need to have a specific angle that you address, or you risk targeting a group of people that’s too big or too small.
Any niche you choose has to be viable. This means you should be able to make money with a blog in your chosen niche.
Check viability by looking for a niche with:
- Existing businesses directly relevant to the niche
- Sufficient search traffic
You can look for both of these characteristics through the keyword search process.
Keyword Search
Use keyword search data to guide you to a topic you can monetize. What you’re looking for is a niche with good traffic and existing businesses. For a new blog, you may also want to find a niche with low-medium competition instead of going for a highly competitive niche.
Start by establishing that there’s enough valuable traffic to sustain a blog without you having to fight for scraps dropped by the big players.
The process goes like this:
-
Compile a list of keywords
Keywords should be related to your topic ideas. Choose broad keywords with a lot of businesses on the first page of your search.
An abundance of long-tail keywords is a benefit for your chosen niche, but not a necessary part of the keyword search process. More on long-tail keywords later.
Check the keyword search volume with Semrush. You’ll be able to see the global traffic numbers as well as search volume in specific locations (US, UK, EU, etc.).
-
Analyze page & domain authority
Page and domain authority are measures calculated to show how much trust Google gives to certain links.
Check these numbers with the free MozBar extension from Moz.Install the MozBar extension to your browser. When it’s active, you’ll see domain and page authority scores below each search result on Google.
Page Authority (PA)
Page authority refers to how much trust is placed on the page itself.Google ranks PAGES, not websites. That’s why you first want to look at how well individual pages rank in your niche before looking at who’s ranking.
If most of the first page results have high page and domain authority, that indicates stiff competition. High page authority is a score of 40 or higher. Search for a niche with no more than 2-4 results having high page authority.
Domain Authority (DA)
Domain authority refers to the trust placed in the domain as a whole.High authority domains (ex: Wikipedia) are naturally favored by search engines when keywords line up. A good domain authority score is above 35.
Results with high domain authority can mean strong niche competition, but only if the domain has significant overlap with your intended niche.
Businesses offering products or services directly related to a keyword tend to have high domain authority. Keep your eye out for businesses that you could partner with in the future to monetize your blog.
-
Check backlink profiles
Backlinks are the lifeblood of SEO. The more backlinks a website has, the more trustworthy it appears to search engines.
Quality backlinks matter. You can analyze how many good backlinks a website has used a backlink checker tool.
Use the same tool to check each time, so you get consistent readings to compare. Different tools may measure in different ways.
You can use Semrush for this as well, or Аhrefs.
An ideal niche has results on the first page with fewer quality backlinks. The more quality backlinks a page has, the harder it will be to outrank it.

Affiliate Opportunities
One of the easiest ways to make money with a blog is through affiliate sales links. When you’re making a blog, you want to choose a topic that offers you opportunities to use good affiliate links.
If you’ve found a niche with a lot of businesses, you should have a few options for affiliate marketing.
A good affiliate opportunity gives you:
- Access to plenty of products in different price ranges
- Fair commissions compared to product prices
- Quick payment of commission fees
- Open information about their program and direct access to service
- Clear signup requirements
- Easy account management
Beyond what you’ve already found in your keyword search process, you can check a specific niche to see which other products and affiliate programs exist in that industry.
Try some of these sites for quick reference:
- Clickbank – Search this database for products related to your potential blog topic. Clickbank has a well-known affiliate link program on all its products. You can use its “gravity” filter to see how many affiliates have made money with Clickbank products recently.
- Amazon – Search for products related to your niche. Do simple keyword searches and look for how many products pop up. You want a few pages worth of relevant products from different brands.
- Google Shopping – Doing a quick Google search in their shopping app helps you get an idea of how many products might be available for you to recommend in your blog content. These products may not be part of larger affiliate marketing programs but may have individual affiliate opportunities.
Look at Blog Topic Lists
If you don’t have a good starting point to do your research, jumpstart the process by looking through blog topic lists.
These lists may not give you an exact niche. The purpose of scrolling through topic lists is to point you in the right direction to start narrowing down your own niche.
Follow the same criteria. Look for topics that have high traffic to use as broad topics, then narrow down from there. Always look for businesses you could partner with so you make it simpler to monetize later on.

Buy a Domain Name for Your Blog
Congratulations!
You have a blog topic idea!
Now what?
No good business can operate without a name. Since your new blog is a business, it needs a name and a domain name. [Not sure what is a “domain name”? You may need to check out our Glossary!]
Naming Your Blog
Spend some time creating your blog name. Your name is central to your brand. It should appeal to your audience and differentiate you from your competitors.
Put the time in now to create a usable brandable name. Changing your blog name, later on, can cost you a lot in terms of SEO, promotion, and readership.
Follow a few simple rules of thumb:
Short and catchy is better than long and drawn-out.
Example: Rogue Banana vs. Bananas & Fudge Brownie Cooperative
Keep it broad enough for slight pivots in your niche.
Example: Pet Clothes Pals vs. Poodle Sweater Pals
Avoid special characters and misunderstandings.
Example: BI Glass Company (URL: biglasscompany)
If you don’t want to sit around and think up a name yourself, you have a few other options.
- Use a blog name generator – Name generators give you a ton of suggestions based on keywords. Type in your blog niche keywords or related keywords and see what pops up. Try one of the numerous choices, including: Nameboy, IsItWP, and WPBeginner.
- Sponsor a blog name contest – Place a reward up for grabs and let people enter submissions in your blog name contest. You just need to give people a little background information about what you’re looking for, then you can sort through submissions and award the prize for the name you choose. Try NameStation for a convenient contest platform.
Searching for Available Domain Names
Choose a blog name that you can also use as a domain name, if possible. This is going to help you with consistent branding and name recognition.
To check if a certain domain name is available, use one of these programs:
- Hostinger.com
- Name.com
- Instant Domain Search
- ICANN
- Domain.com
Purchasing a Domain Name
Domain names straight from the provider usually cost around $10 per year. If you have to bid on them or buy from a third party, they can cost a lot more.
Don’t do that, unless a specific URL is very important for you.
The best domains to get are .com domains. There are nearly endless choices for other domains, like .io or .net, but these never carry the same level of trust as .com and may give you some issues with SEO later on, especially if you use a country-specific domain.
Domain names can be purchased through hosting companies, third-party sellers, or straight from domain licensing bodies around the world.
With Hostinger and some other hosting services, you can get a free .com domain when you pay for a hosting plan.
It’s better to buy the Premium plan since the free domain is included in it.
That leads us right into the next step…

Get Hosting for Your Blog
Think of hosting as renting a space for your blog to sit online. It’s the equivalent of paying for a building to house your business.
Without hosting, no one would be able to visit your website.
Because your hosting provider is essentially the gatekeeper to your website, you have to be picky. Instead of signing up for the cheapest hosting plan you can find, look for a good provider who won’t get in the way of your growth.
A good hosting plan will:
Have an Uptime Guarantee
It’s normal for hosting companies to offer guaranteed 99% uptime. This means they’re guaranteeing that your website will be active and accessible at least 99% of the time.
Think of it this way. If your website was only up 99% of 1 year, it would be down for almost 4 days in total. Even if that’s not consecutive, it’s still a lot of downtime per year that people can’t visit your blog!
You don’t want to work with uptime guarantees below 99%. The higher the better.
Accommodate Your Traffic
Whether you’re on a shared or private server, it needs to be able to handle the traffic you’ve got coming to your blog without crashing.
Ideally, you can get a plan that allows short-term flexibility to adapt to periods of unexpectedly high traffic.
Maintain High Speeds
Your hosting server needs to have fast load times for every visitor, no matter how many people are using it or what time of day it is.
If your page load speed is as low as 0.8 seconds, your site is faster than around 94% of websites on the internet.
Page load speed is a significant factor in SEO. You need a host that won’t slow you down.
Secure Your Data
Hosts have access to your entire website and all your data. While they won’t likely access it themselves, you want a hosting company that has a good reputation for keeping your data secure.
Security is especially important if your blog will contain any sensitive customer information.
Offer Good Customer Support
When something goes wrong, can you get in touch with your hosting provider?
If the answer is no, that’s not a good sign. 24/7 service is ideal, with multiple options for contacting support (phone, live chat, email, etc.).
You never know how important support is until you find yourself in a crisis.
Provide Adequate Resources
Hosting providers offer different packages. Make sure you’re getting what you need in terms of storage space, bandwidth, and shared resources.
If you’re using cloud hosting or shared hosting, make sure you’re getting a fair deal.
Get Web Hosting with Hostinger
Hostinger is one of the best-rated web hosting providers. Although it offers VPS hosting, Cloud hosting, and even Minecraft hosting, it specializes in shared and WordPress hosting.
For new blogs, Hostinger is a great starting point. At first glance, it may seem that its low-cost plans are too good to be true.
For many of the plans, you get access to a free domain, unlimited bandwidth, unlimited email accounts, and unlimited websites. Hostinger’s uptime is solid: 99.9% uptime guarantee.
Still, Hostinger provides all the necessary features you might need and offers excellent performance. The company has servers located all around the world, now in France and India too, so you can choose the closest one and enjoy the best performance.
It is a user-friendly web hosting service known for its affordability and speed, catering to both beginners and experienced users with its wide range of hosting options. Its features make it a popular choice for individuals and businesses looking to establish a strong online presence. If you want to learn more about it, visit here.
It provides a seamless experience with its one-click WordPress installation, making it an ideal platform for bloggers and content creators. Its scalable services also ensure that as your website grows, Hostinger can accommodate increasing traffic and more complex site requirements without compromising on performance.
Although support is available 24/7, response waiting time can be long.
As a beginner hosting plan, Hostinger is a great way to get started with reliable service, steady uptime, and decent performance in the UK, the USA, Europe, Brazil, Indonesia, and Singapore.
Of course, there are countless alternatives you can consider, but we firmly believe that Hostinger should be your starting choice.
Hostinger Alternatives
Hostinger isn’t your only option. Here are a few other hosting services that can get your website up and running:
BlueHost
BlueHost is useful as they are advertised, as a cloud host, so you know what to expect from them. They can be a great option for companies that are small but looking to expand in the future or for big businesses.
DreamHost
DreamHost has good uptime, although it had a few issues before with attacks on the site. You have a lot of flexibility to set up your website and integrate whichever apps and analytics programs you want.
The downside of DreamHost is its support options. Live chat is not 24/7 and people using shared hosting plans don’t have access to phone support at all.
Kinsta
Kinsta is a little more expensive than Bluehost, but for that extra difference, you get guaranteed 99.99% uptime, seamless scalability to accommodate any levels of traffic, and access to servers all around the world.
However, you can’t register your domain with Kinsta. You’ll have to do that separately. You also can’t host your emails through Kinsta, which is a bit inconvenient for beginners.
WPX
If you’re considering running multiple blogs at once, WPX is a nice option that lets you host up to 5 sites on the beginner plan. You also get free daily backups of every site on your plan.
The problem for anyone looking for a more hands-on management approach is that you don’t get Cpanel access, since it’s a managed hosting plan.
SiteGround
SiteGround is another host that offers 99.99% guaranteed uptime. It’s also got an impressively fast load speed to match, especially for WordPress sites.
Compared to other hosting providers, SiteGround has a low data storage cap for users. You’re also limited with how much bandwidth you can get each month, making it problematic if you have a media-heavy website.
GoDaddy
GoDaddy has been around for more than two decades. It’s one of the largest domain registrars and offers a 99.99% uptime guarantee for hosting customers.
Unfortunately, GoDaddy has a reputation for being pricey. You have to purchase a 3-year plan to get the best deal, but the renewal cost will be far higher than you initially paid. There is a lot of upselling of services that other companies offer for free.

Install WordPress
Once you have a hosting plan and a domain name, you’re ready to start building the website itself.
As soon as you have your hosting plan set up, your next move should be installing WordPress.
What is WordPress?
WordPress is the backend of your website.
It’s a program that will allow you to manage everything from the individual pages to the overarching structure that holds your website together.
WordPress is well-known for being a content management system (CMS). Its flexibility makes it a useful tool for individual bloggers and international corporations alike.
39.5% of all websites are run on WordPress. You can’t always trust popular opinion, but it’s a good place to start.
The best part about WordPress?
It’s completely free to install and use on your blog.
How to Install WordPress on Your Blog
There are two ways WordPress can be installed.
Most hosting platforms have quick installation options, especially those operating with Cpanel or Hpanel.
For example, on Hostinger, during set-up after purchasing the plan, you’ll be greeted with a questionnaire that will help to install WordPress with just a click.

If there isn’t a quick installation option, you can install it manually. This is a little more technical.
Quick Installation
Here’s how to do a quick installation through your hosting provider.
Step 1: Log In
Log into your Cpanel through your hosting provider.
Step 2: Locate & Launch Quick Installer
On the main page after logging in, there will be multiple tabs for installing apps you might need. Search for a tab that includes auto installers, CMS apps, or WordPress apps.
Most hosting platforms use an auto installer called Softaculous, though it’s not the only one.
Open the auto installer. It should launch in a separate tab.
Step 3: Click Install
In Softaculous, there is a bright blue “install” button in the top left of the tab.
Step 4: Follow the Prompts
During installation, you’ll be asked to select a few options and fill in specific information, including:
Security protocol (https:// or https://www.)
- Domain name for the installation
- Title information for your blog
- Admin user information
- Other additional information (optional)
Much of the information you’re inputting can be changed from your WordPress admin portal once the installation is finished.
Step 5: Start the Installation
Once you’ve filled in your information, click the “install” button at the bottom of the form. The installation tool should launch automatically.
You just have to wait for it to finish.
After it’s finished, you’ll be presented with a WordPress login link. Use the admin details you filled in before to log into your newly installed WordPress site.
Manual Installations
If your hosting provider doesn’t offer quick installations and you’re comfortable performing a more technical operation, you can install WordPress manually.
There’s a great guide on the WordPress website detailing how to do a manual installation.
Design Your Blog with a Website Builder

With WordPress installed, it’s time to move on to building the frontend of your blog.
The frontend is the part that’s visible to people, that they will see and interact with.
You can build a great blog quickly using a website builder.
Website builders are programs that run on WordPress (or other website backends). They allow you to build a fully functional, attractive website without a lot of technical experience or a huge budget.
There are a lot of good choices for website builders, even if you’re a complete beginner.
Let’s take a look at some of the best options on the market.
Gutenberg
First, it’s worth acknowledging that WordPress has a website builder of its own, called Gutenberg. Unfortunately, acknowledging it is all I’m willing to do.
While WordPress is expanding Gutenberg, it’s still not a great option. Customization is limited and you won’t have access to a lot of the fantastic features that you’d get in a more developed web builder.
Considering there are many other free or low budget options, Gutenberg doesn’t make the cut.
Thrive Architect
Thrive Architect is known for being the best web builder platform for marketers.
There’s a whole suite of tools available from the same company, plus a lot of useful integrations with existing SEO and marketing tools for WordPress.
In the web builder itself, there are a number of great features to help drive conversions, including solid blog post templates and lead generation opt-ins. If you have a strong marketing focus, this could be your best option.
Although Thrive Architect has a good feature set, it’s a little limited compared to a few other web builders on this list.
Pros
- Lots of flexibility to build custom pages
- Useful marketing integrations
- Good choice of templates
- Great for landing pages
- Regular updates
Cons
- Building an interface can be overwhelming for beginners
- Inconsistent customer support
- Limited theme building features
Price: Starts at $19/month
Elementor Pro
The Elementor website builder has two different versions, free and pro.
The free version is very limited and acts more like a basic demo to introduce you to the look and feel of Elementor. I’m going to focus on the pro version since that’s where the good stuff is.
Elementor Pro has a great front-end builder that lets you make and view simple changes as you go. It’s quick to build and edit a great website, even if you have just basic tech skills.
No coding is required, and no digging around complicated menus to find the right options.
For anyone who needs a simple web builder, this is a good place to start.
Pros
- The free version acts as a great trial
- Large community forum support
- Intuitive, user-friendly design
- Easy for beginners
- Tons of pre-designed themes
Cons
- May add unnecessary bloat to your website code
- Limited third party integrations
Price: Starts at $49/year
Divi Builder
Divi has both a theme and a plug-in. While a lot of newbies like using Divi because of its simplicity, it’s not actually the easiest builder to use.
The great benefit of Divi is the way the pricing plan works. When you pay for either the monthly or lifetime package, you can use Divi on an unlimited number of websites.
If you have a lot of separate websites to build, Divi might be a good choice for budget-conscious builders.
However, the learning curve to become adept with Divi is a bit steep if you don’t have any experience already.
Although it’s a front-end builder, so you can see what you’re doing as you go, it’s not always intuitive to understand how to get each module to look how you want.
The large number of options under each menu can be confusing, and the way the menus are arranged makes it a little difficult to find what you want.
Once you’ve gotten used to Divi, it’s pretty quick to edit existing pages and create new ones.
Pros
- Good pricing options for use on multiple websites
- Built-in A/B testing
- Wide variety of templates to work from
- A lifetime package is available
- Large and helpful online community
Cons
- Limited module customization options
- Difficult/buggy when building long pages
- Uses shortcode for building
Price: Starts at $89/year or $249 lifetime
Beaver Builder
Beaver Builder is a beginner-friendly web builder, but you do have to pay a little extra for it compared to some of the other top options.
It has a highly intuitive builder that makes it simple for anyone to throw together a website. Everything is drag-and-drop or click-to-edit from the front-end of your site.
For beginner bloggers who just want to get their site up and running quickly, it’s not a bad option. One of the biggest downsides is the cost.
You can sign up for the Standard package, but you’ll have some limitations on what you can do and use. The better option is the Pro package, which is $199 per year instead of $99.
Pros
- No need for HTML, CSS, or coding knowledge
- Easy features for design reuse
- Simple drag-and-drop builder interface
- Good premade page templates
- Little to no learning curve to get started
Cons
- Beaver Themer (official theme) not included in Standard package
- Support is not always helpful for resolving issues
- No custom CSS for modules
- Higher priced packages compared to other web builders
Price: Starts at $99/year
Generate Press
The main focus of the developers behind Generate Press is the premium theme, but they offer a page builder as well.
This builder/theme combination is pretty popular among many different website owners. It’s simple, runs quickly on most websites, and offers a good range of customization options for both beginners and experienced developers.
While it has a lot going for it, Generate Press doesn’t have as many options as some of the top players in the space today.
One thing to consider seriously before investing in Generate Press is the team behind it. The builder is backed by a very small team. While that’s not a bad thing, it can be risky moving forward.
Smaller teams get stretched thin more quickly and can’t always keep up with the speed or budget of larger teams.
Pros
- Good customer support
- Great speed and performance on most websites
- No need to learn a new interface
- The theme is compatible with many other web builders
- Many options for developers
Cons
- The outdated user interface feels dated
- Limited third party integrations
- No drag and drop building option
Price: Starts at $49/year
My Choice: Elementor Pro + Astra Pro
For my own website, I use a mixture of the Astra Pro theme and the Elementor Pro builder.
Why?
Astra Pro is one of the best WordPress themes around. It’s easy to integrate with almost anything, it’s highly customizable, and it doesn’t bog down my website.
I chose Elementor as a builder because I personally think it’s the best value for money. I find it very easy to use, even though I’m not a professional developer by any means!
How to Change Your Theme in WordPress
I use a paid theme, like many other WordPress bloggers.
If you want to give it a try, don’t worry. Themes aren’t permanent.
You can change your theme at any time.
All you have to do is follow a few steps:
-
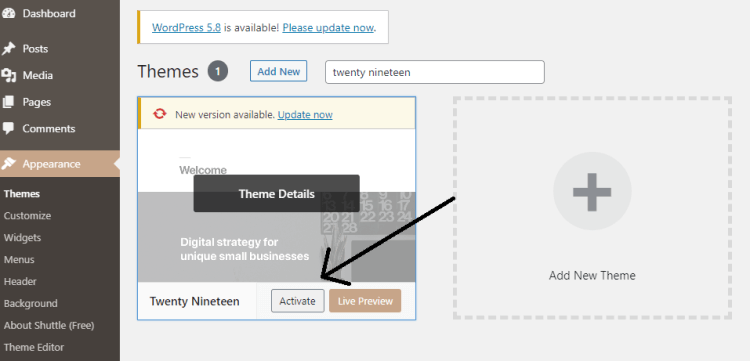
- Log into your WordPress site
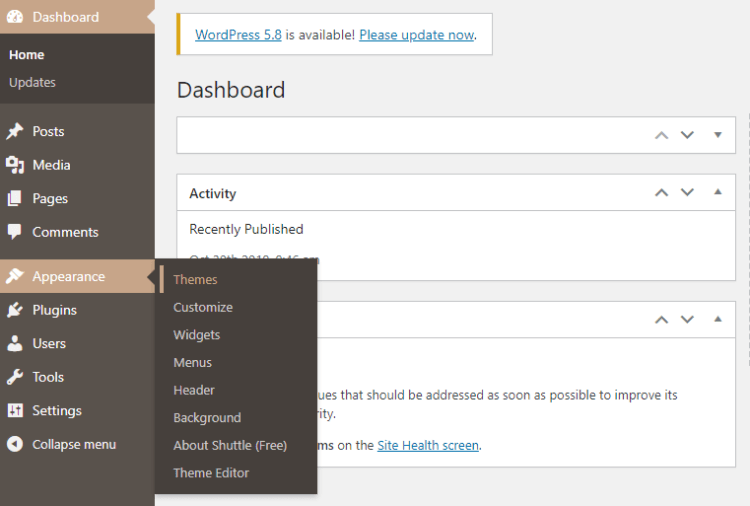
- Go to the themes section in the navigation bar
- Search for the theme you want in the theme search box
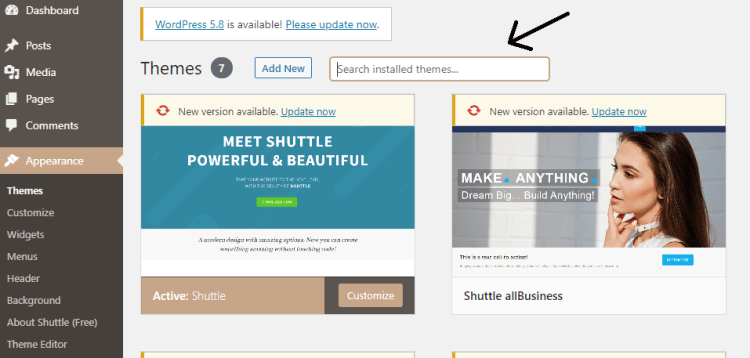
- Hover over the theme result and click “activate”
- Log into your WordPress site


Once your theme is active, you can put it up on your live site at any time.
I would recommend editing the new theme and ironing out issues before making it live. You don’t want to make your theme live only to find out afterward that you’ve broken your site!
![]()
Buy or Create a Logo
Logos are a central part of your branding strategy.
Remember that a good blog is a business.
Businesses need to have some kind of branding strategy if they want to build a relationship with their customer base. In your case, you want to build a relationship with your audience.
While you don’t need to flesh out your entire branding and marketing strategy right now, a logo is a good place to start.
Your first logo may be super simple and act as a placeholder. It’s very possible to change it later on.
You can buy or create a simple logo for a lot less than you might expect!
Best Places to Create a Logo
If you have a bit of creativity and you’re feeling up to it, you can use a free or low-cost logo maker to design your own logo. These are some of the top places to check:
- TailorBrands
This platform generates custom logos for you based on a few pieces of information you provide about your business. You choose what you like and then you can edit it to perfection. Low-res logos are free, but you’ll pay $9.99/month to download high-res logos. There are sometimes promotions going on that allow you to do one high-res logo for free. - Logo Makr
Here’s a fully free tool for creating a logo. You get access to a blank canvas that you can add shapes, clip art, words, and other bits and pieces. Creating and downloading your logo is 100% free. - Brandmark
Brandmark offers a similar service as Tailorbrands. Based on your inputs, you’ll be given a few custom patterns and design prompts that you can then edit. The difference is you’ll also get access to professional edits from the Brandmark design team until you’re satisfied. If you’re not happy with the logo, you won’t pay anything. If you’re happy with it, packages start at $25 as a one-time payment. - Brandcrowd
Here’s another fully free logo maker. With this tool, you’ll be working mostly from images generated based on your industry, audience, or interests. Take the generated images and edit them to suit your branding. - Canva Logo Maker
This is a free logo maker that provides a variety of templates, shapes, and tools for you to use. Some extra features are paid for, but the basics are all free to use.
There are a ton of free or cheap logo makers online. I’ve just chosen to introduce you to a few of the better-known options that are affordable for new bloggers.
Best Places to Order a Logo
If you don’t have the time, skills, or desire to design your own logo, you can pay a designer to do it for you for a very reasonable price.
These are some of the most reliable places to get a logo designer:
- Fiverr
Create a free account, post a job giving a clear picture of what you want, then choose a freelance logo designer from the applicants that apply to your job post. You can pay whatever you’re willing, with a $5 minimum. - 99designs
You have a few different options with different budgets. Work with a low-cost logo designer for $10-50, or start a custom logo contest for $300 or more. - Upwork
Upwork is an online freelance marketplace. You can create an account and post jobs for free. Write up a job description and pick from a list of applicants. You can set the job price at whatever you’re comfortable with, starting from $5. Upwork also has a section where you can scroll through and hire freelancers directly based on specific projects they offer. Prices are included upfront. - Freelancer
Freelancer is another online marketplace for freelance workers of all sorts. Post a job asking for logo design and sort through the applicants until you find someone to hire. Standards at Freelancer aren’t as high as they are on a few of the other sites, so be ready to sort through a bit of spam whenever you post a job. - People Per Hour
With People Per Hour, you can post a project and sort through applications or you can jump directly to the premade offers from freelancers. - DesignCrowd
The main service DesignCrowd provides is a design project contest. You can launch a contest asking for logo designs and receive entries from around the world with 3, 5, or 10-day deadlines. Choose the one you like best, get revisions if necessary, and pay the winner. The price for this starts at $99. - Dribble
As far as logo design services, this is a more expensive option compared with many of the other options listed here. Starting at $299 per month (or $249 per month if you pay quarterly), you can post jobs for top-tier graphic designers to make a logo. - Toptal
Send a job order through Toptal to find a good freelance logo maker. With Toptal, the biggest benefit is that they will find a suitable freelancer for you instead of making you dig around for them. However, this is one of the most expensive options on this list with a required initial deposit of $500. - Guru
Guru is an online marketplace for freelancers of all types. It’s free to post a job there. Once you post, people will apply and you can sort through their applications to choose who you want to work with. - Design Hill
There are 3 options for getting a logo on Design Hill. You can work one-on-one with a designer for your own set budget, purchase a pre-made design (minimum $49), or start a logo design contest. - Working Not Work (WNW)
WNW is a freelance recruitment agency similar to Toptal. For $450 per month (or $300 per month for an annual subscription), you get access to a pool of creative workers in different industries, including logo designers. - Logo Arena
This is a logo contest website where you can get designers to put their entries in based on your specifications. You’ll pick the logo you like best and get the designer to make any simple edits you need. The minimum content prize is $250 with a $1000 maximum. - Freelance Logo Design (FLD)
FLD is a low-budget logo design website that can offer results in as little as 24 hours. There is a $50 minimum prize + a $25 listing fee.

Customize and Set Up Your WordPress Blog
At this point, you’ve got all the pieces in place to turn your WordPress blog into a custom, money-making website.
Here’s how.
Permalinks (URLs)
Start by customizing your website permalinks.
Your website’s permanent links, or permalinks, are what show up in your URL after your domain name. This is something you should set up first before you post anything or establish any permanent pages.
-
Site Link Structure
The link structure dictates how links show up on your site. Standard link structures on WordPress blogs are often just a string of numbers to represent a post or page.
Why does that matter?
Custom links make it easier to identify what’s on a page, both for SEO purposes and for the people actually reading your website.
The good news is you only have to set your link structure once. After it’s set, you don’t have to worry about it again.
Here’s how to change it:
- Log into your WordPress backend as the admin
- Go to the settings tab and select the “permalink” section
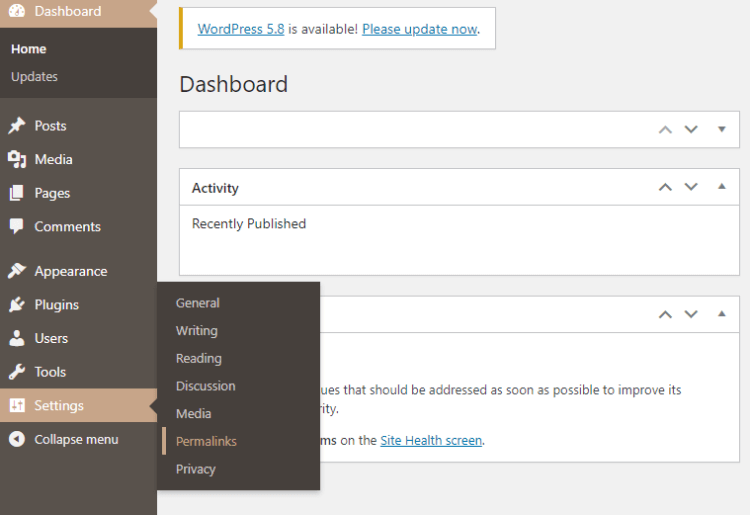
- It should automatically be set to “plain”. Click on the option labeled “post name”

- Scroll down and hit the save change button to update the setting
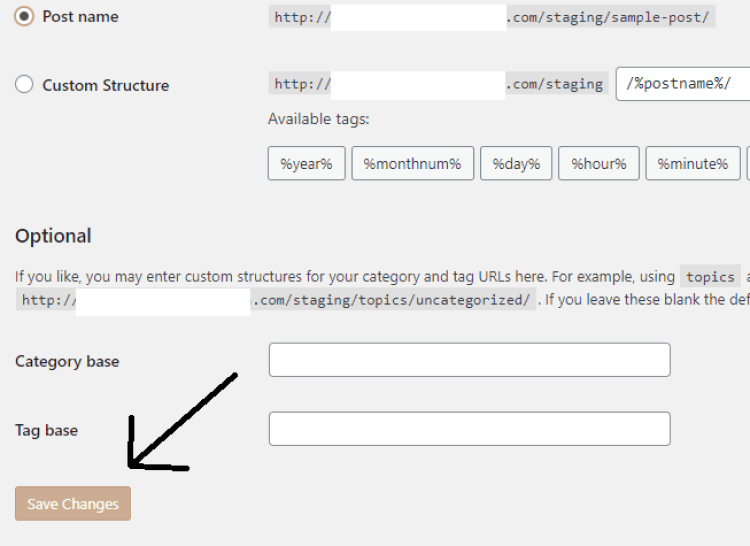


You want the “post name” structure because it’s the most straightforward of them all. Your blog post links will be just your domain name, “blog” or a custom section name, and the specific link you give to each individual post.
This will be the default setting for all your posts, giving you the freedom to customize URLs as you want to.
2. Individual Page Links
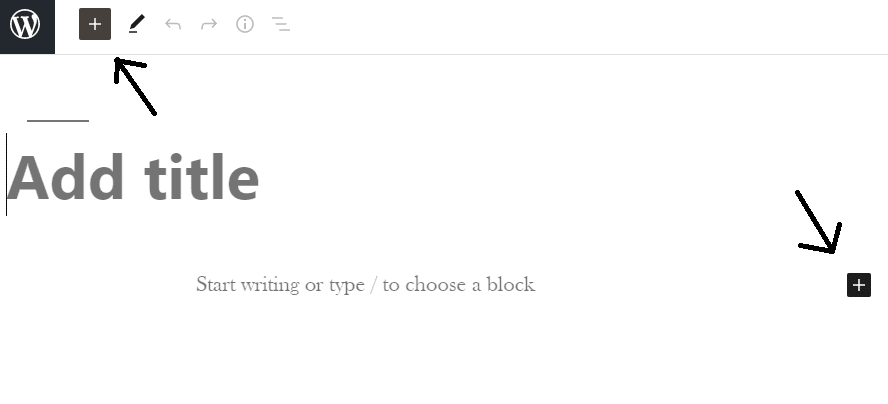
As you post each page, you will have the opportunity to edit the permalink that appears with it.
The option to edit a permalink appears underneath the title in the WordPress editor.
Default permalinks are the title of the blog post, but you can simplify them to something easier for your audience to read before they click.
Once you edit the permalink, don’t change it again. Changing permalinks means you’ll have to create a page redirect, or people may get sent to a broken page if they click on an old link.
Individual page links are changed as you create new content. As long as you have the right link structure in place (step 1 above), your URLs should appear exactly how you want.
Title of the Blog
You’ve already got a blog name picked out, so now you need to change it on your actual website.
Here’s how to do it.
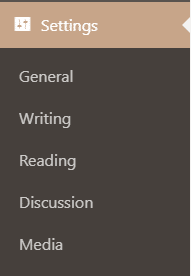
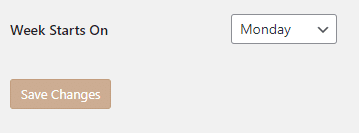
From the settings bar:
- Under the settings tab, click on the General button
- Look for the site title section and change the title text to your new title

- Click Save to activate the change on your website immediately


From the frontend editor:
- Log into your WordPress dashboard as an admin

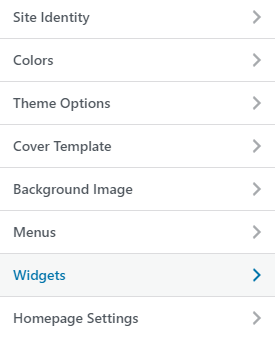
- Underneath the Appearance tab on the left, click on the Customize button
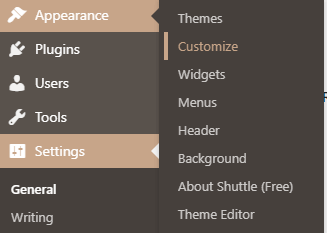
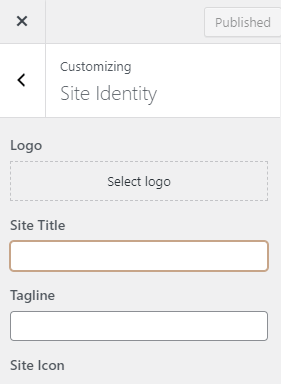
- From the frontend editor, look at the tab on the left side and click on Site Identity

- Find the section labeled Site Title and write your new title there
- Click Save Changes to make it permanent


Add Your Logo
You had your logo created, now it’s time to upload it to your website.
The process for adding a logo will vary depending on which theme you’re using. While many themes follow a similar process, some are unique.
Here’s the standard process:
- From your WordPress dashboard, find the Appearance tab on the left menu and click on “Customize”

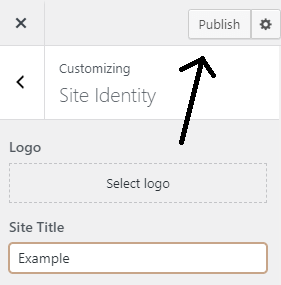
- Click on “Site Identity” and find the section for editing your logo
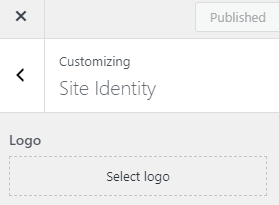
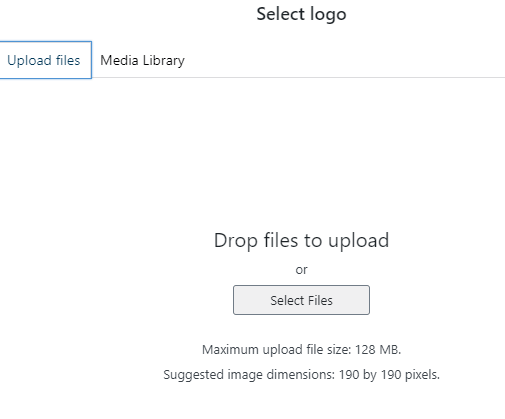
- Upload your logo as a jpg or png. Crop it if necessary to adjust the sizing

- After uploading your logo, look for a section to upload the favicon (sometimes called the site icon) and upload your logo again there

- Click Publish, then view your website to see if the logo and favicon are showing up


Setting Up Your Blog’s Menu
To help people navigate through your website, you need to set up your top menu.
Here’s how to set up a menu on your WordPress blog:
- From your WordPress dashboard, find the Appearance tab on the left menu and click the “Customize” button

- Select the “Menus” option
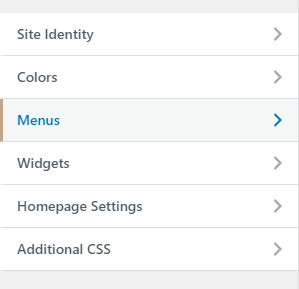
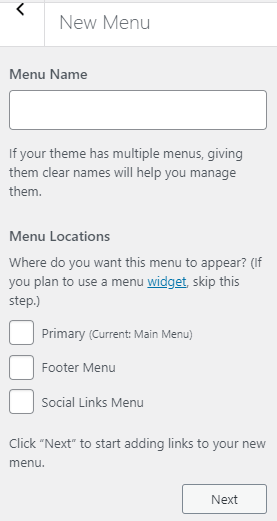
- Most themes have a default menu in place with a name like “primary menu” or “main menu”. Click to edit this menu, or create a new menu instead
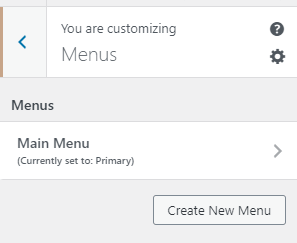
- If you’re creating a new menu, make sure to select where the menu will sit on your website
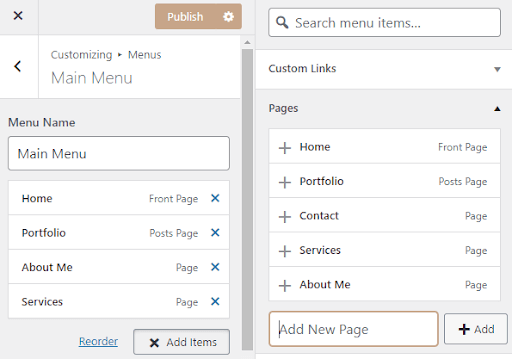
- When editing your menu, add pages by clicking on the “+ Add Items” button and finding the pages you want under the Pages section

- For custom pages, type the page name you want in the “Add New Page” tab and click “+ Add”
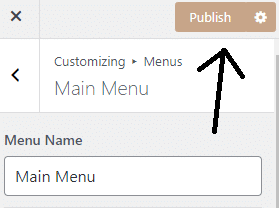
- Click “Publish” to lock in the menu settings


Adding Basic Pages
There are a few pages that are expected on every website. These are the “about me” and “contact” pages.
I also suggest adding a ‘hire me’ page as well, to give you a starting point for monetizing your website.
The pages you want should be on your menu. If they’re not already, you can add them to your menu by following the steps in the section above.
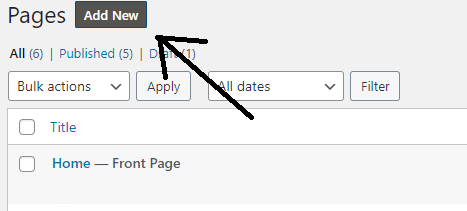
To create a new page, follow these steps:
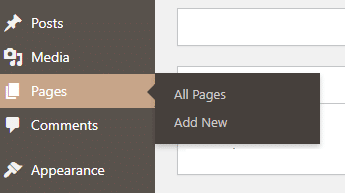
- From the WordPress Dashboard, click on the Pages button on the left menu
- If there are already pages, click on an individual title to open the editor

- From the editor, you can change the name of the page as well as the content of the page. Add text boxes or other page elements by clicking the “+” at the top of the page or after each element.
- If there are no pages present, click on “Add New Page” to create a new page


About Me Page
Having an about me page gives your readers a sense of trust. It’s not an outdated cliché.
What’s included on a good about page?
- Your name
- What your website is for
- How your website benefits your reader
Focus on showing the reader how you will provide value to them. Introduce yourself as someone who they should trust and not just a faceless webpage.
On your about me page, try for short and sweet rather than drawing it out unnecessarily.
Get to the point quickly and leave people with a call to action that points to another page or your relevant social media accounts.
Lastly, don’t try to get too clever with the page title. Include the word “About” in there. It should be abundantly clear what the page is before someone clicks on it.
Contact Page
Contact pages are another necessary part of your blog. If someone has a question or wants to get in touch about anything, how can they reach you?
With a money making blog, you have to balance this out with the need to be practical. Putting all your personal information online isn’t usually a good idea, and it may invite a lot of spam.
Instead of just putting it all out there, one option many people take today is limiting contact information to an email address and a contact form.
Make an email address using your blog’s domain name and use that for your contact address. It will look like this: information [@] example.com.
Next, put a contact form on the page where people can fill out prompt boxes to reach out with their needs or questions. Contact forms can be made from scratch or you can get a simple, free plugin to make it easy.
You can try one of these:
- Contact Form 7 (Some HTML use needed, many tutorials available online)
- WPForms
- Formidable Forms
Ask for specific information like:
- Name
- Contact information (email is preferred)
- Questions, comments, or concerns (reason for contacting you)
To help prevent spam bots from filling in your contact form (and oh, they will!), put a captcha at the end of your contact form. It’s a simple button saying “I’m not a robot”, something you’ve probably seen often enough on other websites.
Unless you have a registered business, there’s no need to put any address or phone number on your blog’s contact page.
Hire Me Page
Around 36% of the US workforce was made up of freelance workers in 2020. You can also try to get a piece of the pie by hiring yourself out for freelance work.
This is an optional page, but I prefer to have a hire me page right from the start. It helps you get into the mindset of monetizing your website immediately.
The best hire me pages have:
- Clear deliverable benefits
Lay it out clearly what benefits you can provide to people who hire you. The purpose of this page is to let potential clients know what they’ll get from working with you. It’s not about what you think is best, but what your potential clients will get out of it. How will the partnership benefit them? Focus on that. - Simple language
Even if you’re in a technical field, don’t write this page for your peers. The people who do the hiring are not usually the same people who read your blog regularly. Write for the C-suite so anyone reading it can understand what you do and how that will help them. - Specific services
Now is not the time to be vague! On this page, tell people the exact services you can be hired for. Do you have a specialty? Do you offer a service that differentiates you from others in your field? For example, if you’re a writer, it’s better to name your specialties to help yourself stand out in the market and always to double-check your work for any copywriting mistakes. You’re more likely to be hired as a commercial real estate writer than you are as a general copywriter. Be specific!
Don’t make this page the centerpiece of your website, but keep it up to date as you go along so you’re always offering people a way to pay you.
Set Up Your Footer
How you edit the footer of your website depends on which theme you’re using.
Here’s how you do it:
- From your WordPress dashboard, click on Customize

- There are two areas you may find options to edit your footer. Go to the “Widgets” tab first.
- Under the Widgets tab, you have the option to add different elements to your footer, including special menus, recent comments, plain text, etc.
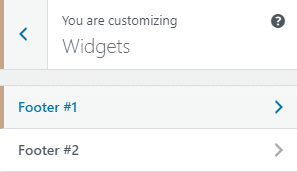
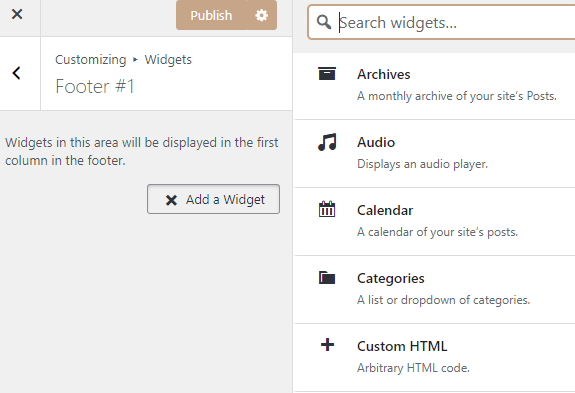
- Next, go to the “Menus” tab and click on “Create New Menu”
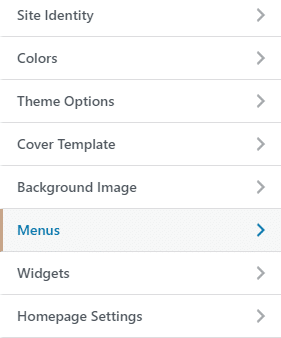

- Set the new menu as a footer menu and add any elements you would like to include in the footer, such as page links, post categories, etc.
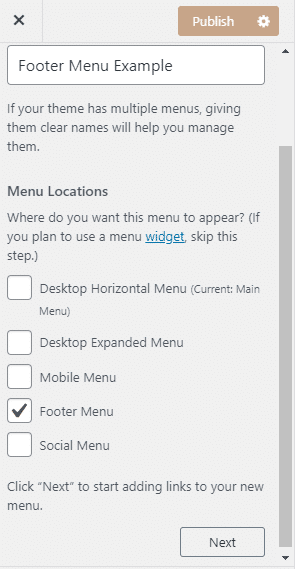
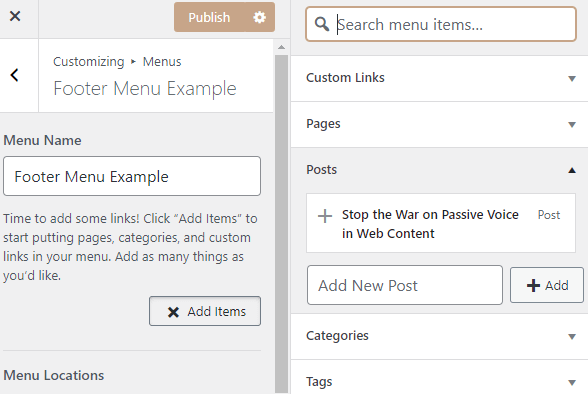
- Click “Publish” to finalize the changes


What should you put in your footer?
Ultimately, that’s for you to decide. Luckily, you don’t have to reinvent the wheel.
These are things you’ll commonly find in the footer of a website:
- XML Sitemap
This is essentially a navigation tool that links to all the main pages on your blog. It’s great for SEO as it helps search engines to find every page on your website more easily. - Related Websites
If you have multiple blogs, you can put the logos and names of your other blogs in the footer, especially if they’re related in any way. - Copyright
This is a good thing for every website to have. Make sure you add in a little snippet of code to keep the copyright year up to date! - Privacy Policy and Terms of Use
Important bits for any blog that will be collecting personal information of any kind, such as from opt-ins or contact forms. - Contact Form
If you want to put a small contact form, make it much smaller than the one on your actual contact page. Don’t put your contact information on the footer, as it may cause a lot of spam. - Social Icons
Link out to your social media in your footer, if you have it. - About Us Summary and Logo
A short snippet about your company can be a nice addition to a footer, especially when it’s paired with a logo. - CTA
CTAs should be simple, like subscribing to a newsletter or downloading a free lead magnet. - Search
Putting a small search bar into your footer helps visitors navigate your website. - Press
Most people looking at your blog won’t be interested in the press section, so putting it in the footer is a good way to include it without clogging up the header. - SEO Keywords
While it’s debatable whether or not putting keywords in the footer actually helps with SEO, it definitely doesn’t hurt, so you can always give it a try.
Whatever you do, DON’T include all these things together in the same footer!
Turn Off Your Blog Comments
As much as this may seem counterintuitive to a blogger who wants engagement, blog comments are usually more trouble than they’re worth.
Some people argue that they’re still valuable, but I don’t think that’s the case anymore.
Blog comments invite spam without providing a lot of real engagement in today’s social media-focused world.
If you want engagement, it’s better to put your energy into social rather than moderating spammy blog comments.
Here’s how to turn them off:
- From your WordPress dashboard, find the Discussion button underneath the settings tab
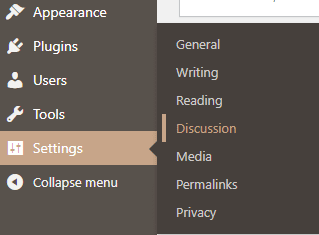
- Look for a section of options labeled “default post settings”
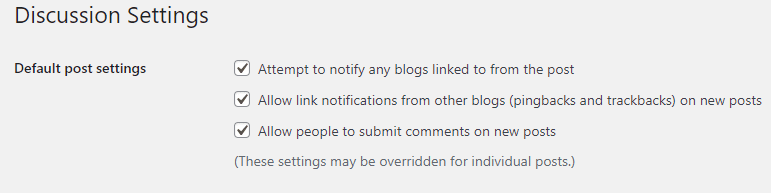
- Uncheck the options labeled “allow people to post comments on new articles” and “allow link notifications from other blogs”

- Click on “Save Changes” to update your website


Which Plugins to Install to Your Blog
Plugins are helpful for getting your blog to do what you want it to without having to write the code from scratch.
WordPress is compatible with an enormous number of plugins, many of which are free or at least have a free version.
Whenever you need something on your website that you can’t do with your website builder or theme, a plugin can usually fill the gap.
Here are a few plugins you might want to consider installing on your website:
Yoast or Rank Math
Both Yoast and Rank Math are SEO plugins for WordPress, so you only need one for your website. Each one offers a free and paid option.
You need an SEO plugin on your website to help you get the right balance of SEO features in your content.
Depending on what premium SEO service you want to use, you may choose your plugin based on that. Otherwise, choose the one with the right feature-set and compatibility with whatever else you’re using.
With the free versions, I prefer Rank Math.
WPForms
I mentioned this plugin before talking about contact forms, but it’s worth mentioning again.WPForms is a free plugin with a wide variety of basic forms you can use around your website.
You can use their pre-made form templates or build your own forms from scratch. There are lots of options, which you’ll probably find yourself using pretty often.
UpdraftPlus
If you have a website, you need a way to back it up regularly.
Attacks, mistakes, errors, and any number of other issues can cause your site to break, meaning you need a way to get it back up and running quickly.
UpdraftPlus is an app that automatically backs up your website and saves it so you can reload it anytime you need to.
The free version is a great place to start, and you can upgrade later on when you have the budget if you need the extra features.
WP Rocket
WP Rocket is a premium caching plugin. Without getting into all the technical stuff, caching plugins can help make your website load faster.
Load speed is hugely important for SEO, especially if you have an image-intensive website. I recommend WP Rocket over a lot of the free plugins because it’s very intuitive, easy to use, and doesn’t add any bloat to your website.
The cheapest plan is $39 per year for one website or $199 for unlimited websites. You can pay annually if you want updates, or just pay once to get lifetime access to the plugin.
StackPath (Previously MaxCDN)
In combination with a caching plugin, a content delivery network (CDN) plugin can also improve the load speed of your website. By allowing visitors to access your website from servers closer to their location, you’ll be cutting down the load time.
My favorite is StackPath, which used to be called MaxCDN. It’s a premium CDN that works reliably. The price starts at $15 per month.
Insert Headers and Footers
Remember all those bits about what to put in your header and footer and how to do it?
This free plugin makes it really simple to do anything and everything with your website headers and footers.
Asset CleanUp
Still on the topic of page load speed… This plugin is free, and it helps you control what loads with the initial page load and what will load up later as the person is already viewing your website.
Being able to make this kind of decision helps you have greater control over your page load speed, especially if you have a lot of images or other media.
Easy Table of Contents
Use this plugin to easily generate a user-friendly table of contents on your posts. It’s a good tool to help people navigate to the parts of your content they actually care about, helping to reduce your bounce rate.
Classic Editor
If you prefer to use the Classic Editor for posts and pages, use this plugin to restore it. Some other editing plugins only work with the classic editor, so this plugin might be a necessity in that case.
Elementor Pro
If you’re going to use Elementor Pro to build your pages, make sure you get the plugin.
This is my favorite page builder and I use it on all of my websites. The plugin makes it really easy to edit every page or post individually, or use templates.
GDPR Cookie Consent
Here’s a simple plugin to help your website comply with GDPR regulations in the EU by asking people to opt-in for cookies when they visit, when relevant.
Mammoth .docx Converter
Instead of copying/pasting your articles from a document into WordPress and hoping for the best, use this plugin to convert your text directly into HTML formatted text.
When you put this into WordPress, it will show up how it’s supposed to. No wonky formatting allowed!
OptinMonster
If you want people to sign up to a mailing list, subscribe to something, or otherwise follow through with a call to action, plugins like OptinMonster are great.
This plugin gives you access to an enormous number of options to create any kind of opt-in prompt you can imagine.
This is a premium app that starts at $14 per month, or $9 per month when you pay a lump sum annually.
ThirstyAffiliates
While you may not need it immediately, an affiliate management plugin helps a lot when you’re ready to monetize your blog with affiliate links.
ThirstyAffiliates is one of my favorite plugins for this. It lets you easily track and change your affiliate links across your entire website, while also cloaking links and giving readers a little more information.
Thirsty Affiliates is a premium app that starts at $49 for a one-site license.
WP Last Modified Info
If you plan to do any kind of affiliate articles, especially reviews, you’re likely going to keep updating them year after year. For this, you want a plugin that displays the last modified date rather than the published date.
WP Last Modified Info is a free plugin that lets you change the date displayed to last modified. It’s simple, but it’s a useful thing to have if you’re going to be updating your articles.
Can You Have Too Many Plugins?
The short answer is yes, you can have too many plugins.
However, there’s a lot of nuance to that.
How many are too many?
The answer is going to be different for most blog owners.
In my opinion, you have too many plugins if there are redundancies and conflicting plugins that harm your website’s performance.
If you have 50 plugins that each do a specific job and your website runs flawlessly congratulations. You’re fine.
If you have 10 plugins that are constantly crashing your site or are doing the same things and slowing down your site, that’s a problem.
DON’T focus on the number of plugins you have.
DO focus on only using plugins that work well together and that are actually providing value without compromising your site performance.
![]()
Tracking Your Blog’s Performance
Having your blog up and running is a great feeling! It’s time to hit the ground running.
Now that it’s up, how do you track your performance?
Get connected to Google Analytics and set up tracking programs that will give you all the information you need to make good decisions about what to do with your blog.
Here’s how to do it.
Install Google Analytics
Start with the main tracking program, Google Analytics.
Create an account on Google Analytics, or sign in to your existing account. Start here.
Follow the prompts and provide all the information about your website to get your account set up.
Once you have an account, go to the Tracking Code section on the left toolbar and copy your website tracking code into a separate document for easy access.
Install Google Analytics to your website
You have a few options for installation. Install through one of your plugins, install through Tag Manager, or install it manually on your WordPress theme.
I’m going to go over a few plugin installations because these are the simplest ways to do it.
Insert Headers and Footers plugin (EASIEST METHOD)
If you’ve installed this plugin, sign in to your WordPress Dashboard, go to the plugins section on the left navigation tab, and make sure the plugin is activated.
Under the settings tab, go to the Insert Headers and Footers section.
Take your Google tracking code (the one you copied and pasted into a document earlier) and paste it into the section called “Scripts in Header”.
This will automatically put the tracking code on every single page of your website.
Yoast SEO or Rank Math SEO plugins
Log into WordPress, navigate to the Plugins section, and make sure whichever SEO plugin you installed is active.
Once you’ve activated the plugin, click on the Settings button under the plugin title.
Find a section titled “Analytics” and follow the prompts to connect your Analytics profile.
You may need to log into your Analytics profile through the plugin or paste your Analytics tracking code into a specific section in the plugin settings.
The plugin will tell you once you’ve successfully completed the process. It should only take a few minutes to get through everything.
Optional: Set up Analytics goals
Under your Google Analytics profile, you can set up specific SEO goals so that Analytics will track and display the information you care about more prominently.
This step is optional because you can still get all the same information without goals. Goals help you display the most relevant information front and center, but they’re not necessary for tracking.
Setting up Analytics is a one-time thing for your website. Once it’s done, it’s done for good.
Install Google Search Console
Search Console is another free tool from Google that helps you monitor and track your blog.
What this tool does is allow you to make sure your site is showing up as it should in Google Search without any issues. It’s a useful tool for SEO.
Here’s how to get connected.
- Sign in to the Google account you use for your website (the one you set up Analytics under)
- Head over to Google Webmaster Tools. Choose either domain verification or URL prefix verification for setup.
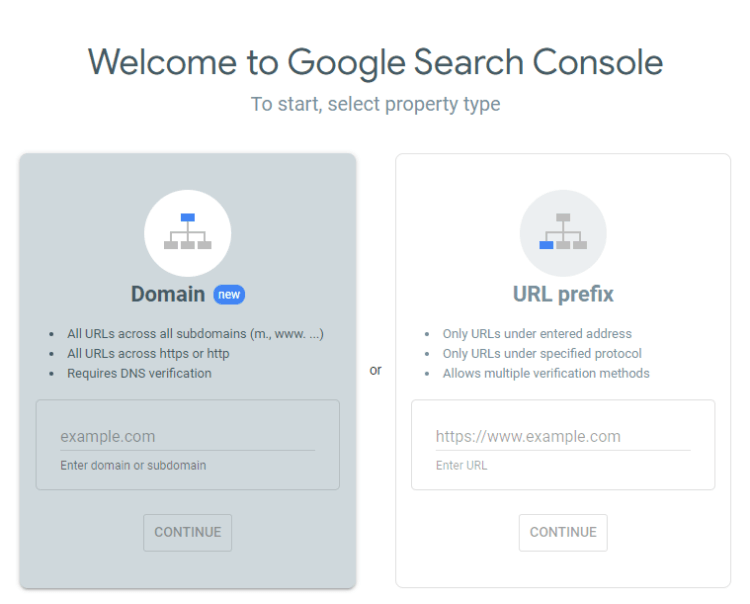
- Follow the steps Google lays out to verify your ownership of your website
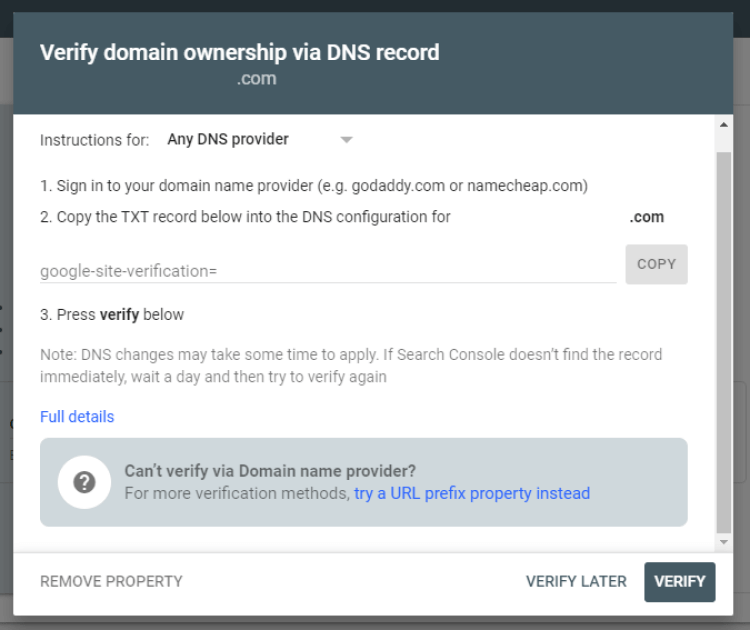
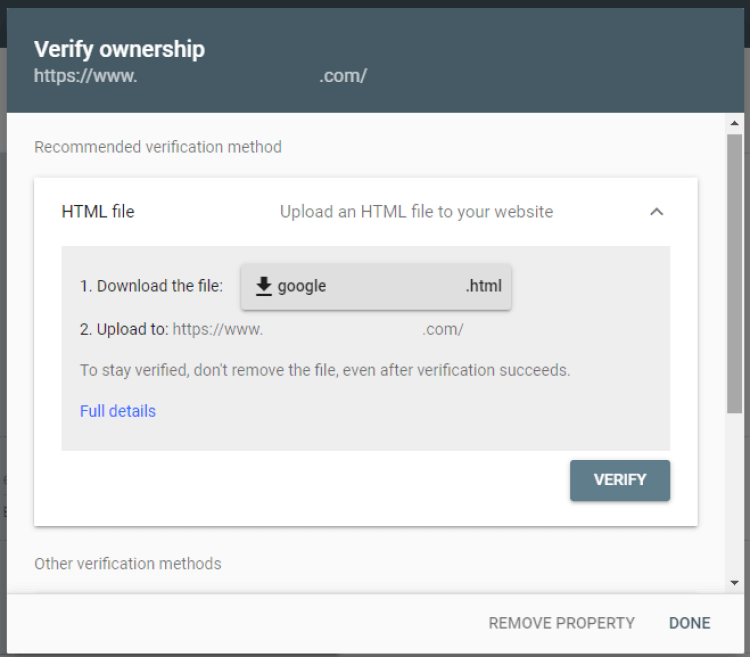


This might feel a little complicated at first, but it’s worth it once you have it set up. You’ll get a lot of helpful information and access to settings that make sure you’re always displayed on Google search results pages the way you want.
Fb Pixel
Facebook Pixel is a separate analytics program that’s also useful for tracking the performance of your business’s Facebook page and paid advertisements. It’s free to set up, so do this as well to make sure you’re getting the full picture of your social media performance.
Here’s how to connect it.
Creating a New Pixel
- Create or log in to your Facebook account
- Go to the Events Manager page
- On the left navigation bar, click on the green “+” symbol titled Connect Data Sources, then select the “Web” option
- Go to the option labeled Facebook Pixel and choose the Connect option
- Provide a descriptive name for your tracking Pixel
- Enter the URL for your website
Adding Your Pixel to Your Website
- Go to the new pixel you created on the Events Manager page
- Click to continue your pixel setup, selecting the option to install the code manually
- Copy the base code and paste it into a separate document for easy access
- Go to your WordPress dashboard and head over to settings, clicking on the Insert Header and Footer section
- Paste the FB Pixel base code into your header section
- When the code is there and you’ve selected save, go back to FB and click on continue
- Click on Launch Event Setup Tool to tell FB what kind of data you want to track. Follow the prompts to complete the setup.
- Click done to finish the setup.
You should now have a Pixel set up to track specific website data.

Collect Email Subs
As much as people keep trying to declare email dead, email marketing still provides one of the highest ROIs of any online marketing activity you can do.
In 2016, Campaign Monitor found that the ROI for email marketing was $44 per $1 spent, up from $38 in 2015.
It’s not 2016 anymore. But, email marketing is still the crown jewel of online marketing, if it’s done right.
Why is it so important? What’s the big deal about email?
- Email is way more personal
- Email subscription shows audience interest or intent
- People still use email every day
- Email lists are yours and no one else’s
For these and other reasons, an email subscription list should be part of your planning right away.
Start building a subscriber list with attractive lead magnets in your posts, then set up an ongoing email marketing strategy.
Create Your Lead Magnets
Lead magnets are things you give away to people in exchange for some sort of contact information, usually an email address. Instead of charging people money, you ask them to subscribe to your mailing list.
A good lead magnet provides value above and beyond what people can find on free blogs already. It’s usually an ebook, short series, free registration for an online event, access to specific content on your website, or something similar.
The idea is to offer something your audience wants in exchange for their email address.
You can make your first lead magnet in 4 easy steps:
Step 1: Identify a core audience need
In starting your blog, you hopefully already took the time to identify your target audience. From that profile, narrow down a few of the main needs that are shared across your audience.
For example, if your website is teaching beginners how to bake bread, one of the main needs for your audience may be a step-by-step introduction to breadmaking.
Try to find at least one need that’s common to most of your audience instead of the needs of a small portion of your audience, at least for your very first lead magnet.
Step 2: Brainstorm solutions to that need
In the above example of baking bread, your solutions could be as simple as the need itself. Beginners need an extremely simple, yet thorough introduction aimed at people with no prior knowledge of the subject.
Brainstorm the best ways you could fill that need. An ebook guide? An exclusive series of articles? A video course?
Find something that works well for you and is easy to present to your audience.
Step 3: Finalize your idea
From your brainstormed list of ideas, narrow it down to 1 idea you can fully commit to. Do your research to make sure your idea is something your audience would get behind.
Step 4: Create your lead magnet
Take the time to create the lead magnet. Do it yourself if you have the time and ability, or outsource the job to a capable freelancer or outside team, with your own thorough instructions.
Get Convertkit and Install Lead Magnets in Posts
So, you have a lead magnet created. Now what?
It’s time for distribution.
Sign up for Convertkit to start. This is a fantastic email marketing service that will help you with everything from opt-ins to email management. If you have 1,000 or fewer subscribers on your email list, it’s 100% free.
With Convertkit, you can put opt-in forms anywhere you want on your website.
These forms let people know what you’re offering and ask for an email address to opt into the deal.
Here’s how to put your lead magnets in your posts:
- Download the ConvertKit plugin and install/activate it on WordPress
- Go to the plugin through your WordPress dashboard and navigate to the forms section
- Click to create a new form
- Choose a template for your form (or design your own), where you want to go on the site, and what information prompts will pop up for your audience
- Connect the form to a specific downloadable lead magnet
- Activate the form
Your lead magnet will now automatically be offered to page visitors.
Create Email Sequences
Email sequences refer to the organized emails that get sent out to people on your mailing list. These are usually sent at specific times for specific reasons and in a specific order.
Your email list should get a mixture of timed and triggered emails.
Timed emails are those that are sent out on a regular basis to keep up communication, such as your monthly newsletter, weekly trends article, or daily market updates.
Triggered emails are those that are sent to people in response to an action they’ve done. An example is a welcome email sent to new mailing list subscribers, a happy birthday email sent out when that information is available, or a thank you message to people who registered for an event.
You want to set up both in order to get your email marketing on the right track.
Triggered Emails
Build up your triggered emails first. This should include a simple email in your voice for a few common triggers:
- Welcoming new subscribers
- Saying thanks for interactions with your brand
- Providing a lead magnet
Depending on what your blog is for, you may want to add other triggered emails, such as:
- Follow up notes/information after an event
- Abandoned cart follow-ups
- Password reset emails
There are infinite possibilities, limited only by your imagination. Make sure every triggered email has a defined purpose so you avoid spamming your subscribers.
Sequential Emails
Sequential emails have a higher degree of flexibility than triggered emails.
Use your sequential emails to build trust with your audience.
A few common types of sequential emails include:
- Informational, teaching emails
- Lead nurturing emails
- Update or newsletter emails
- Curated content emails
- Event or product announcement emails
- Engagement emails
- Conversion emails
Most email sequences you’ll build will have some combination of these and other different types of messages. If you just stick to one all the time you probably won’t see the ROI you want.
Mix up the email types depending on what you’re trying to communicate or accomplish.
Put it all together for a functional email sequence to help your audience stay connected to your blog.

How to Write Your First Blog Post
What’s a blog without any content?
Your website is all set up, so now it’s time to fill it up.
Start with your first post.
Go to Posts
Log in to WordPress. On the left navigation bar, look for the Posts section and click on it.
There will likely be a default post there already titled “Hello world”. You can delete it.
Click on the “Add new post” button to get to the post editor page. This is where you’ll write your blog post from start to finish.
Let’s start at the beginning.
How to Write a Headline
Even though I’m writing about this section first, I don’t recommend coming up with your headline until you’ve written the content itself.
Put a placeholder headline to start, then follow this process to write a great headline after you write your content itself.
Look at the central theme of your content
Headlines have to be directly relevant to the content itself. You’re essentially condensing your main point down to one line of around 55 characters. This is why it helps to have the content completed first, or at least a thorough outline.
For example, if your article is about how to start training for a marathon:
Good headline: “How to Train for Your First Marathon”
Bad headline: “How to Start a Running Routine”
While technically your readers may be starting a new running habit, the main focus of your content is more specific and focused on training for running a marathon.
Look at your content objectively, identify the key things you talk about, and make sure your headline stays within those bounds.
Focus on the core benefit for the reader
The purpose of a headline is to make your audience click. You have to give them a compelling reason to navigate to your website and read your content. How does your readership benefit from your content? You need to put that benefit out front and center.
Put your main keywords into the headline and focus on the way you’re helping your readers solve their problems.
Emotional language is very effective in headlines. Use a headline analyzer like this one to predict the success of your headlines, based on emotional value and a few other factors.
Follow an established headline format
There are a few dominant types of headlines, including:
- Direct headlines
Get straight to the point and tell people exactly what the article is about. Usually for opinion or fact articles.
Example: “Why Paper Books Are Better Than eReaders” - Indirect headlines
These lean towards what you might call click bait. They draw readers in and make them want to click to find out more.
Example: “Doctor Reveals the Secret to Getting Your Perfect Body” - How-to headlines
Whether they include the words “how to” or not, these headlines always explain what they’re going to teach you.
Example: “How to Plan a Garden” or “Set Up Your Garden from Scratch” - News headlines
If you have any industry news or updates, straightforward news headlines work well.
Example: “New Study Predicts the Future Medical Potential of AI” - Question headlines
Asking readers a question is engaging and it tends to make people click to see the answer.
Example: “What’s the Best Place to Vacation in Spain?” - Command headlines
This headline type is not as common, but it’s usually framed as a sort of CTA upfront.
Example: “Start a WordPress Blog Today” - List headlines
Numbered lists make highly effective headlines. Research shows odd numbers are best.
Example: “11 Best Strategies for Training Your Dog + Expert Advice to Start”
While there are other types of headlines, these are tried and tested. Try new and unique types of headlines, as long as you’re testing along the way to see how they perform!
Write at least 5 headlines, then choose one
You might write the perfect headline in one try, but why risk it? The more headlines you write, the more choices you have. Take a few minutes to write out at LEAST 5 different headlines for each blog post. It’s better if you can write 15-20.
Out of this larger list, narrow it down a few times until you’ve identified the best one.
Don’t try to reinvent the wheel. Millions of blog posts are published every year using these basic headline principles. Good headlines tend to be formulaic.
Follow in the footsteps of other successful blogs and you’re also likely to produce consistently good headlines.
Write Your Introduction
While your title convinces people to click, your introduction convinces them to keep reading.
A great introduction can instantly grab your readers’ attention and hook them in to read the rest of the content.
Introductions should be under 100 words, with no fluffy language or unnecessary sentences. Save the exposition for later on in your post.
By starting out with a concise and interesting summary of what the article is about and how the reader will benefit, you’re giving people a solid reason to keep reading.
Just like you drew out the main benefits to the reader for your title, you’ll do the same for the introduction. A few common ways to do this are:
Ask a question
Questions are automatically engaging. Many top blogs use a question to get to the heart of the reader’s problem right from the start. Try starting your blog post by asking the question you’re planning on answering in the content.
Example: “Is social media marketing still worth it in 2024, or are you just wasting your time?”
State a strong opinion or a fact
A surprising statistic or a strong opinion makes great leading lines. Say something that will surprise your readers and make them want to know more. This is a good tactic if your content will include statistics and strategies for improvement.
Example: “The ideal length for a listicle is between 1,700 – 2,100 words. I’m going to teach you how to make the most of those words to keep your audience reading until the end.”
Lead with a promise
Focus on the benefit. What are your readers going to get in exchange for their time, energy, and attention reading through your post?
Example: “Learn the secrets to starting your own blog with my step-by-step guide. By the time you’re done, you’ll be ready to do it yourself!”
Summarize
An introduction should do just what it says: introduce. However you start your introduction, always make sure you include a snippet that gives your audience a good idea about what you’ll be telling them.
Example: “In this post, I’m going to show you how you can increase your conversion rate with the right opt-ins. We’ll look at the best opt-in formats for different types of posts, as well as demonstrating how each one drives your audience to click your CTAs.”
Just like your title, I advocate for writing your final introduction after you finish the bulk of your main article content. Introductions are supposed to touch on points you’re making in your writing, so what better way to make sure they’re connected than to write it all out first?
Always go back and check your introduction while you’re editing so make sure it makes the right promises and tells people enough to keep them interested.
How to Find Free Images for Your Blog Posts
Images are an important part of a blog post. They break up the content and make it easier to digest.
Every image you use should add value to the content of your blog post rather than just taking up space. Infographics, graphs, charts, and screenshots make an excellent addition to content. Stock images are also useful, but only if they’re directly relevant to the content itself.
Here are some of the top free image and graphic galleries:
- Freepik
- Vecteezy
- Unsplash
- Pexels
- Pixabay
- Burst
- Free Images
- Wikimedia Commons
- Kaboompics
- Canva
- PicJumbo
- Crello
There are numerous other free image sites to choose from that I haven’t listed here. You can find an almost endless number of smaller galleries offering free images.
Make sure that any images you use have the following characteristics:
[Not giving any legal advice here, don’t hold me responsible!]
- CC0, public domain, or similar licensing
- Commercial use allowance with no attribution requirement
- Releases for any models, trademarks, or private land featured in the images
Optimize Images and Upload Them to Your Blog
Blog posts with 4+ images do better than those with only 1-3 images. The more the better! Ideally, you should have one image on each scroll length of the screen, meaning around every 200-300 words.
Images break up the content and make it easier to read. It’s even better if you have images with helpful information, such as infographics or statistics.
One study showed that 75% of the information your brain processes is derived from visual sources. This means images, charts, graphs, videos, infographics, etc.
I think we can all agree that images are important for your content. The next step is optimizing images so they do the most benefit with little or no downside.
Here’s what to do.
Add image titles & alt tags
When you upload an image in WordPress, it uploads first to your gallery, then it’s placed into your posts from the gallery.
Go into the gallery and edit the title of the image and the alt tags. You can do this by clicking on the image option on the left navigation bar of your WP dashboard and clicking on the image you want to edit.

Image titles should be descriptive of the image with absolutely no unnecessary words. Alt tags should be similar, but they need to describe exactly what’s happening in the image.
Alt tags are used when the image cannot load properly, and they are also read by search engine crawlers to determine the relevance to a specific keyword. Both image titles and alt tags could land your images in the Google Image Search pages, or just allow crawlers to get a better understanding of what your content is about.
Resize images
The initial featured image can be full width across your website if that matches your design, but other images in your content should be smaller than the width of the words from side to side.
Larger images are unnecessary and can slow website load speeds. Unless you run a photography website, you don’t need a ton of large images in HD for every blog post.
Pay attention to image sizes if you’re automatically sharing to social media as well. Check here for image size recommendations for each social network.
Compress image files
The size of the image file you upload can also slow down your website. You need to compress image files to reduce the size so images will load as quickly as possible for page visitors.Use a tool like Pixlr for .jpeg optimization or Tinypng for .png or .jpg files.
Place images within the content
It’s not enough to have a featured image that automatically shares on social media or appears at the top of the page. Put images throughout the whole post to increase engagement.
These steps are important. Without optimizing images, your website load speed is going to suffer, dealing a blow to your overall SEO.
Optimize Your Blog Post URL for SEO
URLs are the links that bring people to your blog. On WordPress, you can change what the URL looks like after your domain name and category.
To edit URLs, click on the small “edit” button underneath the title in the WordPress editor for each individual post. This will open the URL edit box so you can change it.
I always recommend standardizing your URLs so they all have a similar structure.
Here’s what you should do with your URLs:
- Cut out stop words (a, and, the, an, for, with, etc.)
- Include your main keyword/phrase
- Relate the URL to the post title
Including your keyword is important, because URLs can be a ranking factor for SEO. URLs with relevant keywords are better than those without.
Let’s look at some examples for a post titled: “21 Reasons That WordPress is the Best CMS”
Since you’ve already changed your post settings to display the post name, stock links look like this:
Example.com/blog/21-reasons-that-wordpress-is-the-best-cms
If you didn’t change the default post display settings, your default links will look more like this:
Example.com/blog/?p=123
Ideally, they should be more like this:
Example.com/blog/wordpress-best-cms
By removing stop words, your keyword will be front and center and anyone looking at the link will be able to identify what it’s about immediately. This also shortens the link so it can work as its own anchor text if you have to put a raw link anywhere.
NOTE: Always change the URL before you publish the post. If you change it afterward, there will be a broken link if anyone tries to visit the old permalink, meaning you need to set up a redirect to the new link.
Focus on Topics with Higher Search Volume
Part of writing your blog post is going to be writing it for the right audience. You want your content in front of as many eyes as possible.
Pay attention to the search volume of keywords you’re using so you can stay on track and keep your content relevant to your intended audience.
You can check the search volume of your keywords in Google Keyword Planner, Semrush, Ahrefs, or Ubersuggest.
Since I’ve already written at length about keyword volume earlier in this post, I’ll leave it at that.
While you’re writing, keep your focus on your best keywords.
For example, if your article is about how to start building furniture, you want to have the main keyword that reflects this topic well and has enough search volume to make it worth your while.
Use Headings (H2, H3, H4) in Your Content
When you’re writing your content, you need to think about a few things beyond the actual words you’re writing:
- How can I make this easy for people to read?
- How can I make this easy for search engines to understand and index?
The answer to both of these questions is the same: use HTML headings.
HTML headings work by differentiating different pieces of text as a heading or subheading, making it easy for both people and search engines to understand the structure of an article.
Headings are numbered depending on their importance and prominence in the content.
H1 headings are the most important headings, usually at the top of the page. Some people use the content title as the H1, while others might write a short summary heading at the beginning of the content. There is ONLY ONE H1 heading for each piece of content.
H2 headings are subheadings that break down articles into their main sections. These are the headings that tell you what a section of text is going to be about.
H3 headings break down sub-topics related to each H2 heading. If you break it down even further, you may also want to use H4, but it’s easier to stick with just H3s.
The final result can look like this:
| H1 – Main Page Theme
H2 – Main Point 1 H3 – Supporting main point 1 H3 – Also supporting main point 1 H2 – Main Point 2 H3 – Supporting main point 2 H3 – Also supporting main point 2 |
This article you’re reading right now is a great example of how these headings make things easier to read!
Right now you’re reading an H3 subsection titled “Use Headings (H2, H3, H4) in Your Content”. This is sitting underneath the H2 section “How to Write Your First Blog Post”, giving a little more specific detail. The H2 section is one of many points in the larger blog post theme of “How to Start a Blog”, which is our H1.
By breaking up your content with HTML headings, you’re going to make it so much easier for people reading your post to skim through and find what they need.
You’re also going to make it possible for search engines to index your content super easily, which is going to improve your SEO.
Search for Long-tail Keywords
92% of keyword searches get fewer than 10 searches per month. Does that mean they’re bad keywords?
No. It just means you might not want those keywords as your main keyword.
So many keywords we search for are actually key phrases of 3+ words. Any keywords with 3+ words are referred to as long-tail keywords. It’s the difference between “pancake recipe” and “pancake recipe without eggs”.
The more specific the keyword is, the fewer people you can expect to be searching for it. Rather than ignoring them, research long-tail keywords that are directly related to your main keywords and use them as secondary keywords so you can capture a larger total audience.
Here are a few strategies for finding long-tail keywords:
Direct from Google
From the Google page itself, you find a lot of suggestions for long-tail keywords. Here’s how.
Related Searches
On the bottom of your search results page, there’s a box of keywords titled “related searches”. This box is a gold mine for long-tail keywords.
All the related searches featured are keywords that other people have searched that either includes or are directly related to the keyword you’re currently searching.
Example:
When I searched “waffle recipe”, the related searches included things like “waffle recipe no eggs”, “waffle recipe no milk”, and “Belgian waffle recipe”.

These are all relevant long-tail keywords that could make a great addition to existing content or serve as inspiration for future content.
Autocomplete
On the same search page, you can look at the search bar itself and see what suggestions come up from autocomplete.
With just the keyword, some of the autocomplete phrases were similar to the related searches section, with a few other unique suggestions thrown in.

If you want to get more suggestions, try typing letters after your keyword and seeing what Autocomplete generates based on that letter. Like this:

This is a whole new list of long-tail keywords from just the letter “a”. With 25 other letters to try, your long-tail keyword list will fill up quickly!
People Also Ask
The last place to look on the Google search page is the “people also ask” box right under the first 1-3 search results. Here’s what mine says:

These may not all be directly related to the content you’re writing, but you can still include them in the form of an FAQ section at the end of your related content.
If you’re writing about making waffles, you can put an FAQ section at the bottom of the page with some of these and other questions included.
Bonus tip: If you’ve written any content related to any of these questions, link out to them in the answer section.
Forum and Discussion Board Searches
By putting a few extra words in the search bar along with your keyword, you can find forums and discussion boards related to your keyword topic. Just type something along the lines of “keyword” + “forum” or “keyword” + “reddit”, like this:
Waffle recipe forum
Waffle recipe reddit
Waffle recipe discussion
Waffle recipe quora
These searches are going to point you to places where people are talking about things related to your keyword topic.
From there, you can look at some of the most recent posts and conversations for inspiration.
Let’s try it out.
Here’s the top result I got after searching “waffle recipe reddit”:

Going to that Reddit post, you can get a few suggestions from the discussion comments:


These are all good places to look for new topic ideas or to use for long-tail keyword searches.
Repeat this process on different forums, subreddits, discussion boards, Quora questions, or anywhere else people might be chatting about your chosen topic.
Answer the Public and Soovle
Both Answer the Public and Soovle serve a similar purpose. These are two different websites that give you a ton of related search terms when you enter your target keyword.
The biggest difference is that Answer the Public gives you almost every conceivable variation of your keyword from Google searches, with a heavy focus on questions.
Soovle draws data from all major search engines, not just Google, and presents you with a list of related search terms.
Here’s an example of what you get from each one.
Answer the Public

There are related searches for every letter of the alphabet, as well as lists of questions related to your keyword. There is also a visual data presentation you can look at, but it’s not very intuitive to use, as you can see:

Soovle
Although it looks straight out of the early 2000s, Soovle is a really useful service for compiling search data from a lot of top web sources. Here’s what it looks like when I put in my keyword:

Since this interface is messy, I recommend downloading the results in a CSV file. I’ve indicated where the icon is in the above screenshot. What you’ll get from Soovle is a ton of keyword ideas from different parts of the web, not just Google search.
Make Your Blog Post Readable
No matter how good you are at writing, it’s helpful to check the quality of your writing before you publish it.
I like to use the Hemingway Editor.
This is a free content editor that gives you suggestions about how to make your content more readable to a general audience.
Hemingway Editor shows you:
- How many adverbs you’re using in relation to your word count
- How often do you use passive voice
- Phrases that may be able to be simplified
- Hard to read sentences
- Very hard to read sentences
- Your content’s overall readability score
- How many words, characters, sentences, paragraphs, and letters are in your content
- Estimated reading time for your content
Each different suggestion is highlighted in its own color to help you quickly find specific issues to fix. What you’re looking for is an overall readability score of at least “Grade 6”. Anything higher than this might be too complex or difficult to read.

Blog Content Creation Strategy
If you want to post consistently, you need a central strategy to keep you on the right track.
Setting up a good strategy helps make your actions line up with your goals.
Let’s dive into creating your blog strategy.
Blog Goals: Why are you starting a blog?
At the top of your strategy, you have what’s called “the big why”. This question is trying to get at the core of what’s driving you with your blog.
Why are you starting a blog?
Your answer can be anything, as long as it’s truthful. Some of the main reasons people start blogs are:
- Make money
- Drive traffic to your business website
- Flexible work hours – full control
- Financial freedom – paying yourself
Your reason doesn’t have to be one of these. But, you have to have a definable reason for why you want to start a blog.
Be specific.
Everything in your plan relies on knowing why you’re doing any of this. Wherever your focus is, you should be doing things that will lead you there.
Content Clusters and Pillar Content
You’ve got keywords and a lot more going for you at this point, but that doesn’t mean you should just run full speed ahead. Plan out what you’re going to post on your blog.
The most successful blogs have a plan in place for blog posts ahead of time rather than just jumping in and rushing it week to week.
It’s better to have 100 great blog posts than 1000 average blog posts. Your best content will stay well-ranked for years, as long as it stays relevant. You’ve probably realized this after doing some competitive analysis and seeing posts that are years old still sitting in the top position!
These guys didn’t get their posts to stick by just writing whatever is off the top of their heads. In most cases, they planned their content and laid a lot of groundwork before even writing the first word.
The good news is that you can do this too.
It doesn’t take a marketing degree or 20+ years of experience in the industry.
There are two main ways you can plan out what you post ahead of time. These are content clusters and pillar content.
Content Clusters
Whenever possible, it’s better to create groups of content related to unifying themes.
With content clusters, you’re writing multiple informational posts around a topic that’s relevant to your audience. Usually, these topics are also related to a product or service you offer, so you can slowly point people in that direction.
You can base content clusters off pillar content if you want a solid strategy to start out. More on pillar content later.
Think of content clusters as a wide net for people interested in a topic. You want your content net to be wide enough to catch people searching for a lot of different (but related) keywords, with each piece of content linking to all the others.
Here are a few examples of how this works.
| Service being sold:
Online course teaching logo design |
Content cluster examples:
How to make a logo, logo design principles, why you need a good logo, where to get a logo, how to pick colors for a logo |
| Central website topic:
Investing under $100 per month |
Content cluster examples:
Best cheap investments, how to budget for investing, best ROI for your money, why you should prioritize investing |
| Pillar content topic:
Comparing the best vacuum cleaners |
Content cluster examples:
How to choose a good vacuum cleaner, differences between types of vacuums, the best type of vacuum cleaner for you, vacuuming after pets, noise-free vacuums |
As you can see, content clusters can be based on any unifying theme. The main thing you want to do is focus on themes that will allow you to lead people further down the marketing funnel towards conversion.
If you don’t have something for them to do after reading your content, you’re wasting audience interest and the chance to make a sale. This is one of the biggest mistakes blog owners make when it comes to monetization.
The other thing content clusters do is improve your SEO by building up a solid internal link network. Internal links help search engines determine how relevant a page is to a particular topic.
If you have 10 clustered posts all linking to each other and your pillar content, you’re giving a lot of additional information and context to that central post.
No amount of keyword stuffing can replace a robust network of internal links in your content clusters.
Pillar Content
Pillar content is essential to your blog content strategy. After all, this is what you base most of your cluster content on.
The purpose of pillar content is to support all the cluster content you’re going to write, hence the name. It’s an introductory article that’s thorough, but not exhaustive. It leaves a lot of room for pointing towards more topic-specific content.
Pillar articles are based around broad keywords that are traditionally really hard to rank for. These are hugely competitive keywords with a lot of monthly traffic.
Let’s look at the keyword “logo design” as an example.
Here’s what I saw when I searched this keyword on Ubersuggest:

The search volume is very high, but so is the difficulty. If you wanted to rank organically for this keyword, you can’t do that overnight.
That’s where pillar articles come in.
Your pillar article can be written for this kind of broad keyword. It’s not going to rank well immediately, but as you build up your network of cluster content and you draw in more traffic to those posts, your pillar article’s ranking can improve.
“The slow way is the fast way.”
This old adage is a perfect description of the purpose of pillar articles. There’s no instant solution to ranking for competitive keywords. The fastest way to do it is with slow, steady progress from the consistent effort.
Rand Fishkin describes pillar content as 10x content because it should be 10 times better than anything else that’s already ranking.
Ideally, it should:
- Solve problems
- Answer questions accurately
- Stand out from other results
- Give more detail than other results
- Provide value to the reader (entertainment, facts, actionable steps, etc.)
- Be timeless (evergreen and updated regularly)
Spend time making your pillar content. Don’t rush the process.
Remember that each pillar article you write could attract more traffic in its lifetime than any other individual piece of content you publish.
Know your audience and write a great piece of content that will provide maximum value to them.
Content Calendar
It’s a great step in the right direction to have a plan for cluster content and pillar articles!
To help you stay on track, you should make an organized calendar that lists the details of all the articles you want to write and when you want to write them.
I like to use a Google spreadsheet for this because it makes everything simple to track and interact with.
For a content calendar spreadsheet, you should include:
- Article topics – not titles, unless you’ve planned them already
- Anticipated dates of publishing
- Main keywords
- Long-tail keywords
- Desired word count
- Type of content – pillar or not
- Where your content will be published – which blog, category, etc.
- Who is responsible for writing it
- Status of the content – not started, in progress, published with a link
It’s helpful to start strong so you can have a great foundation for tracking your content as you go along. Head to Google Sheets and make a simple spreadsheet with the above items as columns, starting with the article topic on the far left and the other information in each column to the right.
Make sure you’re updating your calendar regularly to keep up with what’s happening on your blog.
Write Detailed Articles
“When taking a content-first approach, our job as marketers is not to create more content … it’s to create the minimum amount of content with the maximum amount of results.” — Robert Rose
Know your audience. Based on the keywords you’re writing for and the types of people in your audience, you can choose an appropriate level of detail for your content.
Audiences that are low on time need short, concise content that makes a single point and stops. Some content can be ready to publish with only 50 words (think recipes or definitions).
Other audiences want all-inclusive posts that leave them fully informed with actionable steps to get started on something new.
It’s not an either/or situation. Every audience is a little different.
Where does yours land?
Once you can answer that, you should be able to sort out the level of detail needed for your posts. User intent is the key.
Detailed writing tips
Here’s how I make my articles as useful and detailed as possible.
Start with an outline
Plan out your content before you start writing. Do your research, come up with your main points, and lay it all out in a document ahead of time.
Outlines should be loose and flexible.
You don’t have to stick to your initial outline 100% accurately, it just helps to get your thoughts written down and organized early on.
Include statistics
Statistics help you prove a point in a way that’s easy to understand. Statistics can make an excellent opening statement for an introduction to the article itself or to a new section within the article.
What stats do is provide some hard data about your topic. They also give you a way to compare different strategies, results, or general information more directly.
Start off with a recent, relevant statistic. Then, add the context with your words and insights.
Look for original sources
When you’re writing, finding the original source of a quote, fact, or stat can be a mind-numbing process. However, it’s worth it in the end because you’ll be able to get an accurate perspective on the data you want to use and you’ll be able to link to more credible direct sources.
Just because a reputable blogger linked out to a specific place doesn’t mean that’s the actual source. Many blogs link to curated links of stats collected and published by other large industry blogs. These are not the original sources.
You have to find the actual source. Where did the listicles get their information? It helps to take a specific percentage or fact and do a search for specifically worded phrases.
Find the original source and link to it. This is the only way to make sure you’re using information that’s up to date, actually relevant, and credible. The process itself will likely help you learn more about the source and how to use the data in your writing.
Sprinkle in your own experience
Everyone loves to hear personal experience from people who have put action behind their own words, especially in tough industries.
If you have a story that relates to what you’re writing, share it where it makes sense in your content. If you have personal preferences or recommendations, state them where relevant.
Even your own pictures or screenshots can be relevant to your content and will make it completely unique from your competitors.
Anyone can look up a keyword and re-write the basic information from all the other page 1 results. Not everyone can add their own experience to the mix for a comprehensive view of a topic.
Show, don’t tell
As often as possible, use pictures, video, charts, or graphs to help inform your writing. Words matter, but details are better when they’re both visual and text-based.
Support your awesome writing with media that’s just as awesome. You’re going to help your readers retain more information and hold their interest for longer.
Not all posts need to be long and detailed. But, when they do, these tips will help you get it right.
Find Writers to Outsource
If you want to run your blog by yourself, you’re 100% able to do that.
HOWEVER, I would highly recommend outsourcing.
Find a few good writers and let them handle the bulk of your content writing while you focus on getting your content in front of as many eyes as possible.
Writing a good blog post can take hours, even days or weeks for longer posts. While you should be heavily involved in the process of planning the content and giving final approval, you don’t have to use your own time to do the writing itself.
You’ve got your content schedule, your keywords, and your requirements are written out already. With that kind of plan in place, it’s easy for a decent writer to pick up on your vision and make something you’re proud to publish.
Let someone else do the heavy lifting while you spend your time doing something much more productive: promotion.
…Speaking of promoting your blog, let’s dive into how to do that!

7 Ways to Promote Your Blog and Get Traffic
Having a good website and a few great pieces of content is like having a shop full of awesome products, ready for sale.
A few people might come through the doors of your “shop” on their own, but most people won’t ever know what you have to offer unless you get the word out.
For a blog, you get the word out by promoting your content online. There are a ton of ways to promote your blog, some of which might be completely unique to you.
I’m going to go over the 7 best ways to promote your blog online to get the most traffic.
1. Mention Influencers in Your Posts
Influencers are any people with a significant number of followers, who give information or regularly talk about a specific industry.
Estimations put the total number of influencers at around 32 million across platforms. There are large, medium, small, and micro influencers in every industry, from finance to beauty to cooking.
By giving these influencers a nod in your high-quality content, they may turn around and mention you to their followers as well.
To be successful with influencer marketing, you have to be a giver, not a taker.
Be thoughtful in how you mention people. Focus on the good stuff, and try to find an angle about them that no one has talked about before. Then, send them a DM or an email to let them know where they can find that mention.
There are two different ways you can mention influencers in your content.
Individual influencers
Most content doesn’t revolve around expert opinions, but it can include them.
You can use influencers in your industry as examples or case studies to show how they’ve done something well, and how your readers can also get a similar result or follow the advice of that influencer.
For example, if you’re writing a blog post about social media marketing, you can go to your social feed and look for some of the best ads, sponsored videos, and posts from influencers. Screenshot picture ads, embed images/videos/GIFs, or links to the specific posts.
Credit the source with links and the name of the influencer.
Expert roundups
Another way of mentioning influencers is in an expert roundup. Expert roundups take the views and experiences of a lot of different influencers and prominent industry figures and put them together in one topical article.
Do an expert roundup to answer a common question in your industry. Use a direct quote from each expert, as well as their picture, name, and position.
Always link out to where people can find them, such as social media profiles they use or their professional website. If possible, ask that influencer ahead of time if they want to provide a quote for you directly, even if you’ve already found one somewhere else.
2. Publish Guest Posts
Guest posts are any blog posts you write and publish on another person’s website. They’re different from ghostwritten posts because you will be credited for writing the work.
In return for writing a post, you’ll most likely get links back to your website. These can appear in a short author bio at the end of the article or within the content itself under relevant anchor text.
Finding opportunities
You have a few easy options for finding blogs that accept and publish guest posts.
Google it
A few quick Google searches can often bring up a lot of guest post opportunities. Do searches combining your keywords plus specific phrases like these:
“guest post”
“write for me”
“write for us”
“guest contributor”
For someone in the app development industry, a search query could look like this: app development “guest post”
It’s useful to put quotation marks (“ “) around the additional search terms so that the results that show up will contain those exact words. Try with and without quotation marks to see what kind of results show up.
Backlink analysis
Go to your competitor’s websites and do a backlink analysis on them. Any legitimate SEO tool on the market can do competitor backlink analysis, including SEMrush.
Look for pillar articles or other pieces of content that are recommended on their website. Once you’ve collected a list of your competitors’ backlinks on these pieces of content, skim through them and check for external links from industry-related blogs.
Check those blogs for sections about how to contribute. Even if they don’t have a section for it, you may still want to add them to your list to contact, just make sure you make a note that there’s no specific method of contact.
Social media searches
Similar to using a search engine, you can also search large social networks for guest post opportunities.
In the search bar, type industry keywords with guest post or similar key phrases. You don’t need quotation marks in these searches.
This works especially well on Twitter, where there’s a lot of “inside knowledge” spread around to those who take the time to look for it. Many people tweet about having done a guest post or opportunities to submit guest posts.
Join a forum
There are entire forums dedicated to connecting writers to people with websites who want to do a guest post.
Join one of these forums and look around for posts from blog owners, or post your information and let people know you’re looking for opportunities to write for them.
How to publish guest posts
Hopefully, by following the suggestions above, you have a decent list of guest post opportunities compiled. The next step is to reach out.
For blogs that have a page detailing how to pitch a guest post, read their instructions THOROUGHLY and follow them as closely as possible. Often when a blog owner goes to the trouble of writing a page like that, they have a good reason for it. Be one of those people who follows the process.
If there are no specific instructions about how to pitch a guest post, find a contact email for someone in charge of the blog and send your pitch directly.
Let them know who you are, what your blog is about, and the topics you’d love to write about for them (which are relevant to what they usually publish).
Once you make a pitch, wait to see what kind of response you get from it.
Smaller blogs may want a reciprocal agreement where you post for them and they post for you. Others may ask you to send more pitches or write about a specific topic, or they may say they’re not accepting guest posts at the moment.
If a blog owner doesn’t have a specific process laid out for guest posts already, you’ll probably have a little back and forth discussing the details of what you’re going to do. That’s okay.
Whatever responses you get, keep in touch with the blog owner and build a relationship. You may get the initial guest post and potentially have more opportunities for guest posts or other forms of collaboration in the future.
3. Paid Ads
Ranking organically takes time. There’s no way around it. Ads enter the scene as a way to boost your existing business.
I don’t recommend ads for new blogs because the ROI is not going to be high enough compared with other things you can be investing in, such as content creation and link building. Paid ads work better when you have some consistent traffic (better ad targeting) and something to monetize your website.
Once you’re ready for ads, you have a few options.
Google Ads
Google Ads is one of the most common places to advertise, and one of the best if you have a lower budget. You can create ad copy and choose to advertise on keyword searches at a lower cost per click (CPC).
The CPC determines how much you have to pay for every person who clicks on your ad. You want to find keywords with a low CPC that have the potential to bring in traffic.
One of the best ways to use Google Ads is to create a mirror audience based on the traffic you already have. This way, your ads will get in front of people who are more likely to be interested.
Facebook Ads
Beyond Google Ads, you can also advertise on social media platforms. I recommend starting with Facebook ads since these are well-suited for blogs and you have the option of advertising on Instagram as well.
Create an account with Facebook Ads, then follow the prompts to narrow down your audience and define the objective for your ads. This helps determine who will see your ad.
You’ll also need to create a copy and supply an image for the ad. Follow the guidelines strictly, or your ad could be removed for violating the terms and conditions.
Sponsored Posts
You may also consider sponsored content for similar results.
Many influencers will create content about you for their audience. You just have to pay their fee.
When you’re ready to jump in, I recommend you look for micro-influencers first. These are newer influencers with a smaller audience, but their audience is often highly engaged. Find an influencer who aligns well with your brand and whatever you’re offering through your website.
Micro-influencers won’t charge as much per post, so you may be able to get multiple posts from a few different influencers for a smaller budget. Make sure you check the engagement numbers of any influencer you want to work with before you approach them.
You can also publish sponsored posts on social media networks by posting something to your blog’s account/page/profile and boosting it. Most social media platforms have their own version of post sponsorship that will get your post in front of more eyes.
4. Reciprocal Sharing
Scratch my back and I’ll scratch yours.
That’s the idea behind reciprocal sharing.
You can make agreements with other blog owners to promote each other on social media. By sharing each other’s social media posts, you can get exposure to new audiences.
DO NOT create an agreement to directly exchange links in your content itself, because this is in violation of Google’s Webmaster Guidelines. They do not allow reciprocal linking as a standalone practice. It may not be particularly helpful anyway when the link has no real context.
By sharing each other’s social media posts, you can boost traffic for each other while helping your own audience find other relevant content creators to learn from. If you want to be an authority in your industry, having a list of authoritative partners can help.
Try partnering with a few different bloggers in related industries and giving a shoutout to each other on social media whenever appropriate. Avoid your direct competitors as much as possible.
5. Use Your Blog Posts for Email Marketing
I’ve already emphasized the importance of creating an email list. Well, here’s yet another way to use that email list!
Blog posts make great material for emails to your list, especially if you understand the audience you’re writing for.
You have three main options for email marketing with blog posts.
Curating posts
If you post often, or you regularly read articles from a lot of related industry blogs, you can send out curated lists of articles that are a must-read for the day, week, month, etc.
Make sure to include your own relevant blog posts in the curated lists.
This is a helpful strategy in industries where things don’t move at breakneck speed. That means that while it may work well for real estate content, it may not work for stock market updates.
Sending full posts
For shorter blog posts, especially a series of related posts, you can use the blog post itself as the content for the email.
Just make sure you change up the formatting to give the post a proper greeting before you dive in.
Post previews
Instead of putting the entire blog post into an email, you can send out a snippet of the article with a link to read the full article on your website. You could also introduce the topic by identifying a problem, then linking to your blog post as a way to address that problem.
Think of this as an extended introduction to a blog post. The goal is to get people to click over to your website.
Use what you know about your audience and your mailing list to make your email copy as compelling as possible.
6. Leverage Your Email List
Your email list can be a powerful tool to build useful relationships. The combination of your social media followers, email list subscribers, and other direct contacts can make you a good ally for many different brands.
It’s up to you to make it happen.
Build email marketing partnerships with brands and other blog owners to spread the word about your blog as far as possible.
Partnerships can look different for every blog. Here are a few common ways to work together with other brands:
- Collaborate on an event, project, or product to offer to both of your subscribers
- Receive sponsorship for a contest, special offer, or giveaway
- Recommend each other’s content in emails to subscribers
- Contribute to curated content emails
- Sharing special dates or announcements
- Share each other’s content on social media
The other way to leverage your email list is to use it to create mirror audiences on ad platforms.
If you’re using social media ads or Google ads, you can take the demographics and data from your email list subscribers and base your ad focus on groups of similar people. This is a highly effective way of targeting your ads.
7. Use the Power of Communities, Groups, and Q&A Sites
Engagement is never guaranteed with increased traffic. A good way to get traffic that’s going to engage with your content is to promote your blog through topical groups, such as forums, Q&A sites, and social media groups.
Try these avenues to start:
Facebook groups
With your Facebook account, search for groups relevant to your blog topic. There are probably numerous existing groups that would be relevant for you. Join a few active groups.
Jump into the discussions in the group, but be natural. If you go in and post links to all your new blog posts, you may get kicked out of the group. That’s not what people want to see in a group.
Discuss the topic, answer questions, make recommendations, and engage with content there. If you make yourself a useful member of the group, you’ll be able to drop links to your blog when you have something relevant to share that would be of interest to the group.
If you just lurk and don’t engage, members may not be as willing to tolerate promotional posts.
Once you have a large enough following, you can consider starting your own Facebook group to help with promotion even more and build engagement with your audience.
Quora
Using Q&A sites is a great way to build your credibility as an industry authority site. On top of that, the best answer to a question on Quora gets a prominent spot on the top of the page and might even show up on Google search results.
Create an account on Quora and fill in your user information as thoroughly as possible.
Make sure to place your blog name prominently, like this: “owner of Example blog”. Also, put it in your profile information so anyone looking at your profile can find your blog.
Set a time at least once a week to get on Quora and answer questions related to what you talk about on your blog. Don’t use your whole answer to just point to your blog, although you can put a link in your answers when it’s relevant.
Answer questions thoroughly so you can increase your chances of getting upvotes and becoming the top answer. Use personal experience whenever possible, if it’s relevant.
Good answers to questions can be seen by thousands of people each month, depending on how often the same question is asked.
Industry forums
Search for your industry or popular keywords for your industry plus the word “forum”. Find some of the top forums for discussing topics relevant to your blog.
Sign up to a few of these forums and join in the conversation. You may find a lot of ideas for new content when people ask questions on the forum. You can also link out a few times if you’ve written something directly relevant to a question that someone has already asked.
8. Using social media to promote your blog
I’ve mentioned paid social media ads, but you can start promoting your blog even if you don’t have a marketing budget. We’ve also mentioned a few strategies like utilizing groups, but there’s still more you can do.
To start, make sure you’re targeting the right social media platforms.
Choosing a Social Media Platform
This might get a little bit technical but stick with me.
For example, TikTok and YouTube are ranked as the 2nd and 3rd most popular social media platforms with Gen Z and Millennials. Snapchat is linked as the most popular for 2020, but the growth of platforms like TikTok may overtake it soon.
Although Facebook has the most users of any platform (2.7+ billion active users in April 2021), it’s one of the least popular with audiences under 35. However, it’s the most popular with older audiences. In the US, 46% of adults over 65 use Facebook, a higher percentage than any other social network.
By the first quarter of 2019, there were 330 million monthly active users on Twitter. That number is likely higher now. This is a great platform for building authority in your industry. You can tweet out notable lines from your content, but you can also respond to others in your industry. Use your Twitter account as a place to educate, especially if there’s a business angle to your business.
Choose a platform that your audience uses.
Once you’re set up on your chosen platforms, you can automate the process of updating when you publish a blog post. Your featured image will be automatically put as the post image, and you can create a short description of each post being sent out.
In addition to these posts, set up a series of automated posts to go out throughout the week or month. The more you post, the more each platform will allow you to reach more people.
Engage with your audience as often as possible, responding to comments and liking things posted by other brands or influencers.
Managing Multiple Platforms
You can have a presence on all platforms if you’re willing to put in the work upfront. Rather than logging in to post on all platforms every day, you need to have a system in place to automatically publish for you.
Choose 2 platforms that you’re going to actively use, based on where your target audience can be found and the type of content you’re going to be delivering. Then, set up your accounts for other platforms to essentially run on autopilot.
Repurpose content to fit multiple platforms and create social content that’s easy to adjust for different platforms.
Use a service like Hootsuite or Buffer to manage all your accounts and keep up a consistent publishing schedule.

How to Make Money from Your Blog
Ultimately, your blog is a business. As a business, it needs to be self-supporting at some point.
It’s difficult to monetize a new blog, but you need to begin thinking about monetization early so you can plan for it.
Depending on how you’re going to make money from your blog, you’ll need to focus on different things.
To help you decide how you plan to monetize and how to prepare for it, here’s an overview of some of the best ways to make money from a blog.

7 Ways to Monetize Your Blog
If you want to make money with your blog, you’re going to need traffic.
Focus your energy first on building traffic to your blog. Then, you can begin earning through one or more of these methods.
Offer Consulting Services
Many informational blogs give a lot of room for consultancy work. If your topic is based on an industry that’s service-heavy, you may be able to get paid to consult for individuals or other businesses once you gain some recognition.
This is a common way to monetize blogs that deal with marketing, SEO, writing, investing, business practices, productivity, or health and wellness.
Even if you’re not in one of those industries, you may be able to find creative ways to offer your services as a consultant.
Sell Ad Space on Your Blog
This method is widely used, but not always well-paying.
You can start out early with Google Adsense once you have a few posts up and your website fully built. You aren’t likely to make much for a while.
On average, blogs with Adsense can make around $5 – $30 per 1000 views. The higher end of that scale only applies if your blog is in an industry with higher CPC rates on keywords and you get traffic from specific high-income countries. Most blogs fall closer to the low-mid range of earnings.
When you get more traffic, you’ll have access to better-paying ad services like:
- Media.net – Traffic needs to come from the US, UK, or Canada. Content must be updated regularly and in native-quality English. (Average $150 per month for small blogs, paid by impressions)
- Mediavine – 50,000 monthly page views minimum. (Average $20 per 1000 page views)
- Ezoic – 10,000 monthly sessions minimum. (Average $15 per 1000 page views)
Besides ad networks, you can consider signing up for an affiliate program relevant to your blog and including affiliate links in your content.
Publish Sponsored Posts
You can get paid a lot for sponsored posts on your blog, depending on how much traffic you have. If you have 10,000 – 50,000 monthly views, you could make between $175 – $250 per sponsored post.
More traffic and higher engagement mean more money from sponsors. Domain authority and domain rating (Ahrefs) are important metrics to sponsors. The better your DA and DR numbers are, the more sponsors you’ll be able to attract.
Make sure that if you’re going to publish sponsored posts you follow the guidelines from Google. Every sponsored post should have a prominent label telling the reader that it is sponsored and who the sponsor is. The page URL should also feature a sponsored link attribute.
Sell Your Own Digital Products on Your Blog
Make and create awesome digital products for your viewers.
Online courses and ebooks are a great first step into monetization. Both can earn you passive income for years after you’ve made them.
Digital products need to be well made and useful to your audience. Create something that really gives them the value they’re paying for, then charge what it’s really worth.
The average price for online courses is around $182. Your course could sell for a lot more than this if you’re providing actionable value to your readers.
Ebooks are another digital product that can do well once you have a decent following.
Beyond courses and ebooks, you have an almost endless opportunity to sell digital products, depending on your industry and creativity. Think up ideas on what you could sell to your audience, or look at what your competitors are doing.
Sell Memberships
If you offer any kind of premium services, you can build a membership service.
This works well for people who gain a following and can release extra content that’s exclusive to members. With a monthly membership fee, you can get a steady income from your members.
Memberships rely heavily on your authority within your industry and the unique value you can offer to your members. You can create a membership around any product or service in any industry, as long as people are willing to pay for what you have to offer!
Get Public Speaking Gigs
Writers are uniquely positioned to launch public speaking careers.
You’re already in the business of providing valuable information. Public speaking is just another way of doing that.
Build your credibility by writing often and publishing under your name in as many other places as possible. Try to stick to your main topic and focus on solving problems.
Once you have a good routine going, forward some of your best or most public articles to meeting planners and companies you’d like to work with as a public speaker. It’s difficult to get noticed if you’re not putting some effort in.
It might take a little time before you get traction, but if you keep going you’re likely to start getting some interest for paid public speaking gigs.
Sell Physical Products on Your Blog with Dropshipping
Instead of relying on affiliate links, you could actually sell products yourself without ever having to touch them.
Dropshipping allows you to sell a wide range of products through an existing service, outsourcing the storage and order fulfillment roles to that service.
Decide which products you want to sell and advertise them on your website. You can start selling through a large service like Amazon or Shopify, both of which have similar fees for their service.
The great thing about dropshipping is that there’s no upfront cost to purchase what you’re selling. You don’t need to have a large inventory ahead of time, so you can purchase only the number of items actually paid for by your customers.
Sell products that help solve your readers’ problems. If your blog grows successful enough, you may be able to transition this into selling your own branded products later.
Job Marketplace Website
Your blog could become a valuable resource for people looking for work. If your niche is anything related to work, or highly relevant to a specific industry where people are often looking for work, you may be able to advertise job openings for pay.
Employers will pay you either on a monthly membership basis or per post in order to put up job posts for your readers to see. The more readers you have, the more offers you’re likely to get from employers, especially if you can demonstrate that the demographics of your audience match what the employers are looking for.
Use a plugin like WP Job Manager to help you organize job postings. This free plugin lets employers post jobs and manage their postings.
Accept Donations
If you’re providing high quality content to your readers and helping them solve their problems, you can ask for support from your readers to keep your blog going.
Collect donations or consistent monthly support through platforms like:
- Patreon
- Buy Me a Coffee
- Tribe
All you have to do to start this is to put a small notice on all of your content (top or bottom of the page) mentioning that your blog is user-supported and that you would appreciate any support. Drop a link to a place people can support you.
You might be interested to check those related posts as well:
- How to Write a Blog Post in 14 Easy Steps in 2024
- 37 Best Blogging Tips and Tricks for Beginners [ & Advanced Bloggers] in 2024
- 21 Most Popular Types of Blogs [in 2024]
FAQ
How much do bloggers make?
Your income as a blogger depends on how you’re monetizing your blog. On average, bloggers can make:
- $100 per month within the first 6 months
- $200+ per month within the first year
- $2,500+ per month within the first 3 years
To make your first $100, focus on strong monetization strategies from the beginning.
Can I change the name of my blog later?
It’s possible to change your blog’s name later, but you can lose a lot of momentum from backlinks and mentions that point to your old name and domain. Get around this issue by creating a 301 redirect so that all your old links will point to your new content.
What is a blog?
Blogs are websites that are regularly updated with informational posts. They usually display posts in reverse chronological order. All posts are focused on a specific topic.
Blogs can be independent websites or features of an existing business website. Individuals or companies can run blogs.
How many blogs exist in 2024?
There are more than 570 million blogs in 2024. Broken down, the numbers look like this:
- Around 75 million WordPress blogs
- 496+ million Tumblr blogs
- 600k+ Blogger blogs
Millions of additional blogs are hosted and run on other websites, but these 3 make up some of the largest platforms today.
Are blogs still profitable in 2024?
Yes. In most niches, you can easily earn $.01 – $0.05 per visitor from ads alone. Blogs can also make money from:
- Sponsorships
- Memberships
- Selling products or services
- Selling courses
- Donations
- Affiliate marketing
- Selling ebooks
- Offer to coach
With multiple monetization strategies, your blog can be highly profitable within the first 6-12 months.
Can blogging make you rich?
Absolutely. Top bloggers can make anywhere from $100,000 – $1 million per month!
Some of the highest paid bloggers (that we know about) include:
- Tim Sykes – $1m+ per month
- Melyssa Griffin – $200k+ per month
- Sarah Titus – $200k+ per month
- Chiara Ferragni – $200k+ per month
- Pat Flynn – $200k+ per month
The number of millionaire bloggers increases every year.
Does anyone read blogs anymore?
People still read blogs on a daily and weekly basis.
- 77% of people read blogs regularly
- In the US, people spend more time on blogs than their email
- Businesses that have blogs get more traffic than those that don’t
Blogs are commonplace for people to get information on all different topics today.
Does blogging still work in 2024?
Blogs work in 2024 if you think of them as a business and put in the effort to make them work. Once you have good content, you have to put in the work to promote your blog so you can grow your traffic. If you treat your blog like a casual hobby, you may not get the readership you want.
Is it worth starting a blog in 2024?
Bloggers can still make money in 2024. It will be worth it if you’re willing to do what it takes to grow your audience and monetize your blog. Start a blog in a profitable niche and put in the time to help it grow. You could start earning $500-$1,000 per month or more by the end of your first year.
What has replaced Blogging?
Social media platforms have replaced personal life blogs. These are platforms that are designed for storytelling, such as:
- TikTok
- Snapchat
- YouTube
Informational blogs have not been replaced. They remain a vital source of information for people around the world, especially in English-speaking countries like the US, UK, Canada, and Australia.
Why do blogs fail?
The majority of blogs fail because the blog owner doesn’t invest enough time to create relevant, high-quality content that stands out from the competition.
Other reasons include:
- Writing without your market in mind
- Not considering monetization early enough
- Lacking purpose or direction
- Spending too little time on promotion
- Having no distinct value to offer readers
What percentage of blogs make money?
About 5% of blogs earn a full-time income annually, with about 9% earning $1000 per month or more. 37% of blogs make between $3.50 – $1000 per month. These stats take into account personal Tumblr blogs and other general blogs. Bloggers who make the most money tend to spend a lot of time on SEO to grow their organic traffic.
What is the best day to post a blog?
The best day to post a blog is the day your audience is spending the most time online. This depends entirely on who you’re writing for. Look up your demographic and see when they most often use social media, log in to their email, read the news, and browse the web.
How many blogs should I post a month?
Quality matters more than quantity. But the ideal number of posts for a lot of traffic is 11+ per month or 2 – 4 per week. The more you post, the more likely you are to get traffic, as long as your content is good. Having great content sitting on your blog means more potential places for readers to find your blog.
How do I get more readers to my blog?
Get more readers to your blog by writing more, focusing on keywords with traffic, building your email subscriber list, and promoting your blog in places where your audience spends time online. SEO and blog promotion are an important part of helping readers find your blog.
How do I get my blog noticed by Google?
Focus on SEO in each blog post. Your content should be directly relevant to your chosen keywords and be better than those pieces already on the first page. Have an overarching strategy for your blog and plan ahead so you can maintain a consistent publishing schedule.
Which blogs have the most traffic?
Some of the blogs with the most traffic include:
- Huffpost
- Hubspot
- TMZ
- Lifehacker
- Business Insider
- The Verge
These are long-standing blogs that have authority in their industry.
How much does it cost to start a Blog?
Blogs cost somewhere between $35-65 for a year’s worth of expenses when you just start out. This includes the domain and hosting for a full year. Those are the only things you have to pay for to start blogging today. Other tools are very useful and can help you make your blog successful, but they’re not necessary to get started.
How do you start a blog for free?
You can start a free blog through services like:
- WordPress.com (not .org)
- Tumblr
- Wix
- Blogger
Free blogs are not able to get all the SEO benefits of paid blogs with a domain and hosting. For most free blogging services, all you need is an account on their website and you can launch a blog within minutes.
Can you start a blog for free in 2024?
Yes. You can start a free blog through a blogging platform like:
- WordPress.com
- Tumblr
- Wix
- Blogger
Instead of starting a free blog, you can also invest in starting a blog on your own domain with a hosting plan for as little as $35 per year. This way you can have full ownership of your blog and your traffic.
How do I start a food blog in 2024?
Look for a new angle on a popular food niche or a group of people who are underserved in the food blog space. Use great pictures and post content that’s relevant to questions people ask in that niche. Make sure you pay attention to branding so you can stand out among other blogs with related topics.
How do I Start a Fashion Blog in 2024?
Research a fashion trend you know about and start a niche-specific blog. Fashion blogs tend to do better if they have a catchy name, high-quality pictures, and a strong social media presence. Use visual examples as often as possible to get your point across more effectively and increase reader satisfaction.
How do I start a Travel Blog in 2024?
Define your audience, not your travel niche. Set up your website and at least one social media account. Post highly visual content that matches what your audience likes, such as:
- Trips they want to take
- Travel tips to help them
- Unique places around the world
- In-depth reviews of travel hotspots
While you can post about your own personal travel, make sure you have an appealing angle.
Can I Start a Travel Blog Without Travelling?
Yes. You can write about all kinds of travel-related topics without ever traveling. Write about topics that don’t require location-specific pictures or experience, such as:
- Travel hacks
- Travel safety tips
- Travel gadgets or gear
- Planning a trip
- New travel destinations
- Upcoming events
- And more!
There are so many ways to write about travel without traveling. Be creative with your topics.
How Do I Start a Beauty Blog in 2024?
Find a beauty topic you can write about well. In the crowded beauty space, position your blog to give a unique take on your topic. Launch your website and make sure to post great visual content so people can see what you’re talking about more easily. Keep up a consistent social media presence to promote your blog.
How Do I Start a Tech Blog in 2024?
Look for a profitable tech niche with low-medium competition. Find your unique audience within that niche and start writing tech content based on what they want to read. Write for your audience specifically. In-depth reviews and video content work well in tech.
How Do I Start a Lifestyle Blog in 2024?
Narrow down your lifestyle blog topics to 3 – 5 things of interest. For a more unique blog, you can combine lifestyle interests and write for a more specific audience. Cater your website and writing style to match your audience. Focus on conversational writing that helps people make positive changes in their lives.
How Do I Start a Mommy Blog in 2024?
Search for parenting keywords with room for improvement in content. Plan your content around these topics, then come up with a blog name and domain name to match. Do your best to stimulate conversations and engagement on your content and your social media profiles by asking questions and answering every comment you get.
How Do I Start a Fitness Blog in 2024?
Choose a niche that makes sense for your fitness knowledge and ability. Build your website around the specific value you can offer your readers, whether that’s coaching, encouragement, or just good information. Use personal pictures whenever possible as a point of connection, and update your blog and social media often.
How Do I Start a Business Blog in 2024?
Find a unique angle for your audience. Build your blog around the value that only you can provide to your readers. Focus on writing content that’s concise, evergreen, and actionable. After that, work at getting it in front of the right eyes through effective SEO practices and consistent social media posts.
How Do I start a blog about mental health in 2024?
Mental health blogs require a fine balance between relatability and practicality. Unless you’re a doctor, you can’t give medical advice. To start a blog about mental health, find a topic that you can write about without needing to dispense medical opinions. Link to and reference medical studies and information from reliable sources.
Should I Start a Blog About My Life?
If you want to monetize your blog, you shouldn’t start a blog about your life. People don’t read those anymore. It’s okay to get personal with whatever topic you’re discussing, but don’t make the entire blog about your life. There should be a central theme for your blog, where you can sprinkle in your own stories and experiences.
How Do Bloggers Get Paid?
Bloggers get paid by monetizing their blogs! You can get paid through:
- Ads
- Affiliate links
- Partnerships
- Direct sales
- Offering services
- Dropshipping
- Sponsorships
As a blog owner, you’re responsible for setting up the systems that will allow you to get paid and for bringing in the traffic to spend money, click on ads, or use affiliate links.
How much time does it take to start making money from a blog?
You can start making some money from your blog in its first month if you dedicate the time to it. Plan how to monetize your blog from the beginning and you can start making real money within 6 months, and potentially earn a full-time income in just over a year.
How long before a blog gets traffic?
New blogs can start getting traffic in search results within 3 – 6 months once you begin to show up in search results. You can get traffic before then by promoting your blog consistently. If you publish blog posts regularly and stay aligned with your strategy, you’re likely to see traffic grow steadily.
How to start a blog on Instagram?
Create a new account for your blog. Add a bio to your account that describes what your blog is about, then put up a profile image. Post your content in the form of captions under relevant images. Your posts can be up to 2200 characters long which are long enough to provide value without requiring a long attention span.
How to start a blog on Facebook?
Facebook blogs are made through pages. To launch a new page, sign in to your Facebook account and add a page from there. Choose the type of page you’re creating, then set up your permanent page title, bio, and profile picture. Post content with images or videos and a written message with a lot of short, catchy paragraphs.
Can I Start a Blog on My Phone?
Yes. You can start and run any blog through your phone. The easiest blogs to start and maintain on a phone are blogs on Instagram or other social media platforms. These platforms are well-suited to mobile users, unlike some WordPress websites that may be more difficult to set up, edit, and manage from a phone.
Can You Start a Blog on Wix?
Yes. You can use Wix as a free blogging platform. However, you will have little or no control over your SEO, especially since you cannot purchase your own domain name for a free blog.
Can I Start a Blog on Medium?
Yes. You can start a free blog through Medium. Since it’s a free blog through the site, you won’t have full control over your branding, domain name, SEO strategies, or monetization. Wix can be a good place to start blogging if you want to experiment with it and see if starting a blog is right for you.
How to Start a Blog on LinkedIn?
Create a LinkedIn profile or log in to your existing profile and start writing posts. LinkedIn is a great place to write for an audience of professionals. Consider this:
- Around 57% of LinkedIn users are men and 43%, women
- 76% of LinkedIn users come from outside the US
- Almost 60% of LinkedIn users are aged 25-34
- In 2020, content creation on LinkedIn jumped up by 60%
Start a Blog Without Writing
Written blogs aren’t the only types of blogs. Try an alternative method instead, such as:
- Photo blog
- Vlog (video blog)
- Simple storytelling blog
Visual-focused blogs work well in lifestyle niches. Find a niche that doesn’t need long content to provide value to your audience. If you want to limit how much writing you have to do, look for a more casual niche.
Can You Start a Blog Anonymously?
Yes, you can start a blog without using your real name or information. You can create a pseudonym and publish your posts under that name. While it can be helpful to be personally involved in your blog with your name and picture, it’s not necessary at all. Find a way to write that’s comfortable for you.
Can You Start a Blog Without a Domain?
The only way to start a blog without a domain is to use a free blogging service. Examples include:
- WordPress.com
- Wix
- Tumblr
- Blogger
You can’t host your own blog without a domain name. Even if you pay for hosting, you won’t be able to do anything until you have a domain name to set up.
How Do Bloggers Pay Taxes?
Most bloggers pay taxes the same way a self-employed person or business owner would. It will most likely be considered as income from self employment or independent contracting, depending on how you monetize your blog. This varies from country to country, so check the local tax laws in your area.
Starting a Blog Vs YouTube
Both YouTube and a blog can be a source of revenue. Blogs tend to be more long-lasting since the content can sit for years and be seen and referenced by anyone. YouTube channels usually don’t experience the same longevity, and they have fewer options for monetization. YouTube videos can also be great for your blog to add variety to your content.
Starting a Blog Vs Podcast
Podcasts are a popular way to get your message out. Usually, a podcast is easier to launch if you already have a following. Try starting a blog first and building up a readership before launching a podcast. You may find it’s easier to get a podcast audience if people are already reading your blog and you have some traffic.
Starting a Blog Vs Instagram
Instagram is a good visual platform. If you’re blogging in a field that’s fast-moving, like lifestyle or fashion trends, it can be a great free platform. Blogs are better for building a long-term presence and evergreen content. Avoid starting an Instagram blog if you want evergreen content that attracts readers organically through search engines.